Creating an AI agent
AI agent creation video
Watch the walkthrough video:
If the embedded player does not load, open it directly here: AI agent creation video.
When you create a new AI agent, a wizard walks you through four steps: Templates, AI Config, Knowledge Base, and Integrations. The left sidebar shows your progress. Use Next and Back at the bottom. Close the wizard with X (or Close) when it appears.
For a short first-time path, see Create your first AI agent. This page covers each step in full.
Where the wizard appears
Start from Dashboard (for example live.chatmaven.ai/dashboard) and click Create New Agent. You can also start from Agents.
| Step | Label | Purpose |
|---|---|---|
| 1 | Templates | Choose a starter |
| 2 | AI Config | Configure the AI |
| 3 | Knowledge Base | Add knowledge |
| 4 | Integrations | Connect apps |
Below the steps, SPOTLIGHT lists shortcuts such as Web Chat and WhatsApp for work after the agent exists.
Step 1: Choose a Template
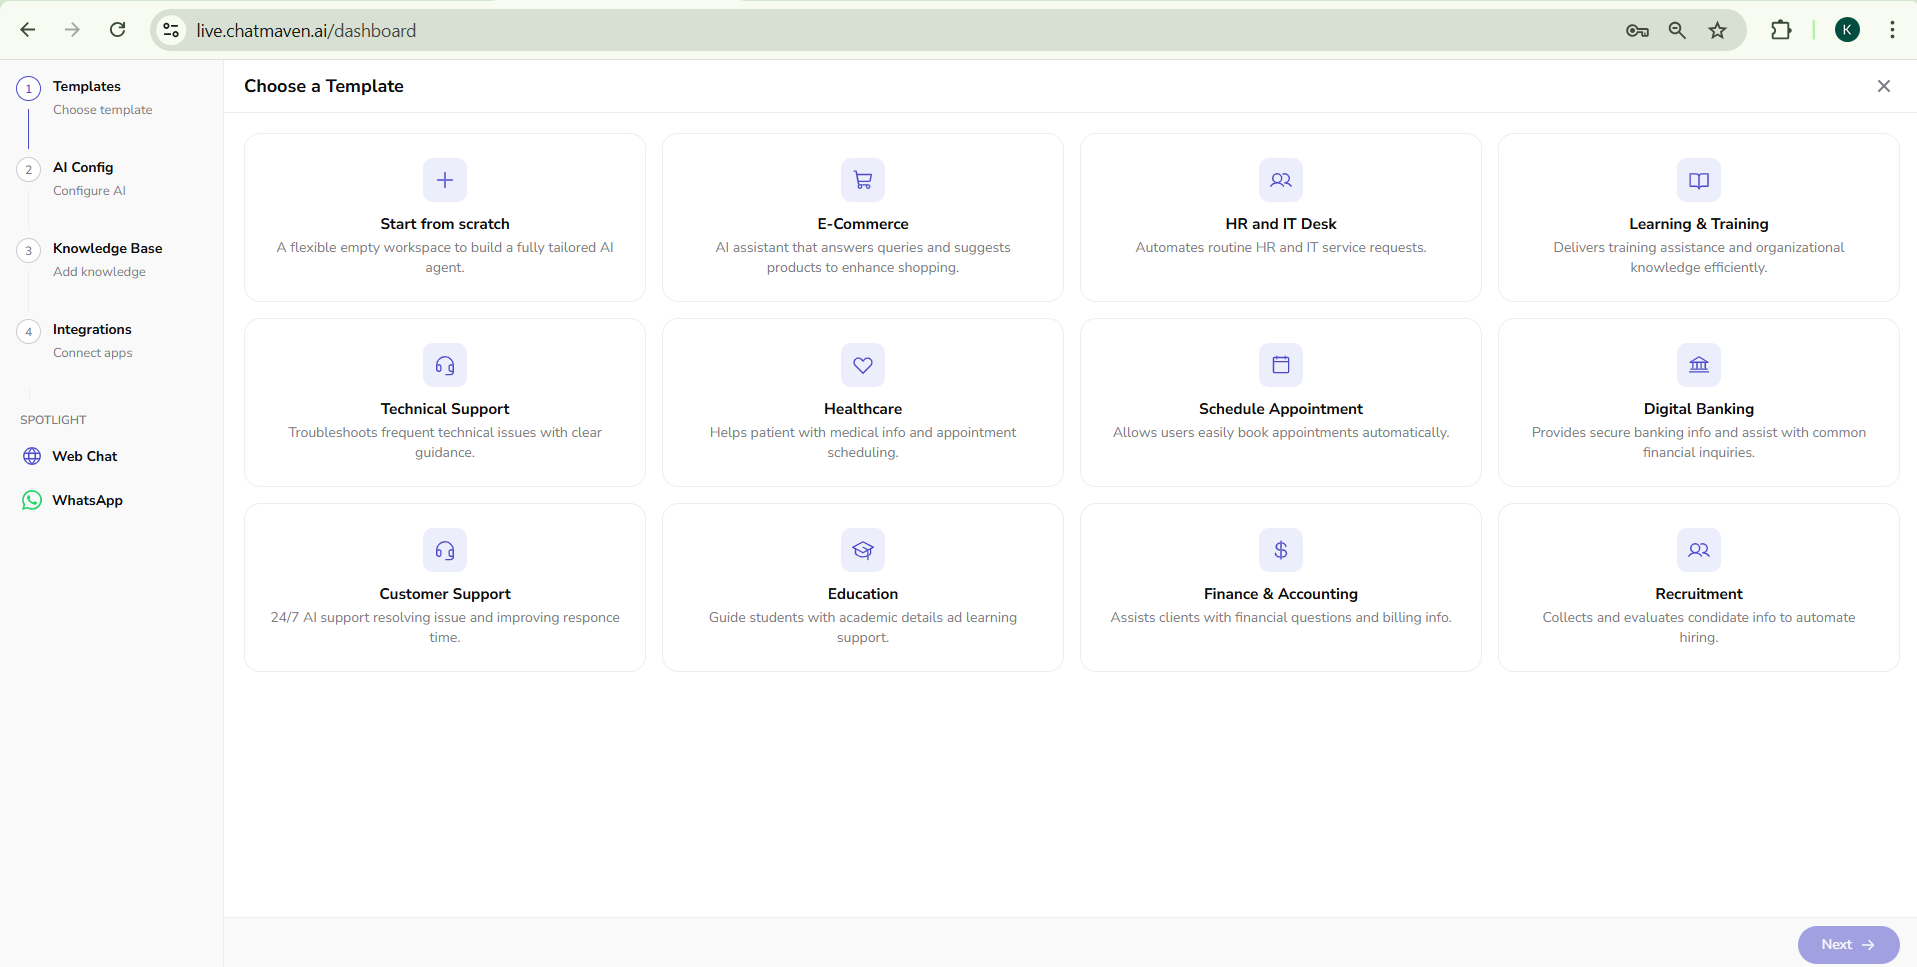
The main area is titled Choose a Template. Pick one starter card, then click Next.
| Template | Typical use |
|---|---|
| Start from scratch | A blank agent you configure yourself. |
| E-Commerce | Product questions and shopping help. |
| HR and IT Desk | Routine HR and IT requests. |
| Learning & Training | Training and internal knowledge. |
| Technical Support | Common technical issues. |
| Healthcare | Medical information and appointments. |
| Schedule Appointment | Booking-focused conversations. |
| Digital Banking | Banking and financial questions. |
| Education | Academic guidance. |
| Finance & Accounting | Billing and finance questions. |
| Recruitment | Candidate intake. |
| Customer Support | Everyday support replies. |
Start from scratch
Start from scratch opens Define Your Agent. Describe what the agent should handle, or pick a preset (Customer Support, Sales, HR, Education, Healthcare). You can close that screen to return to the 12-card grid.
A named template (for example E-Commerce) goes to AI Config after Next.
You can change instructions and knowledge after the wizard.
Step 2: AI Config — Basic Settings
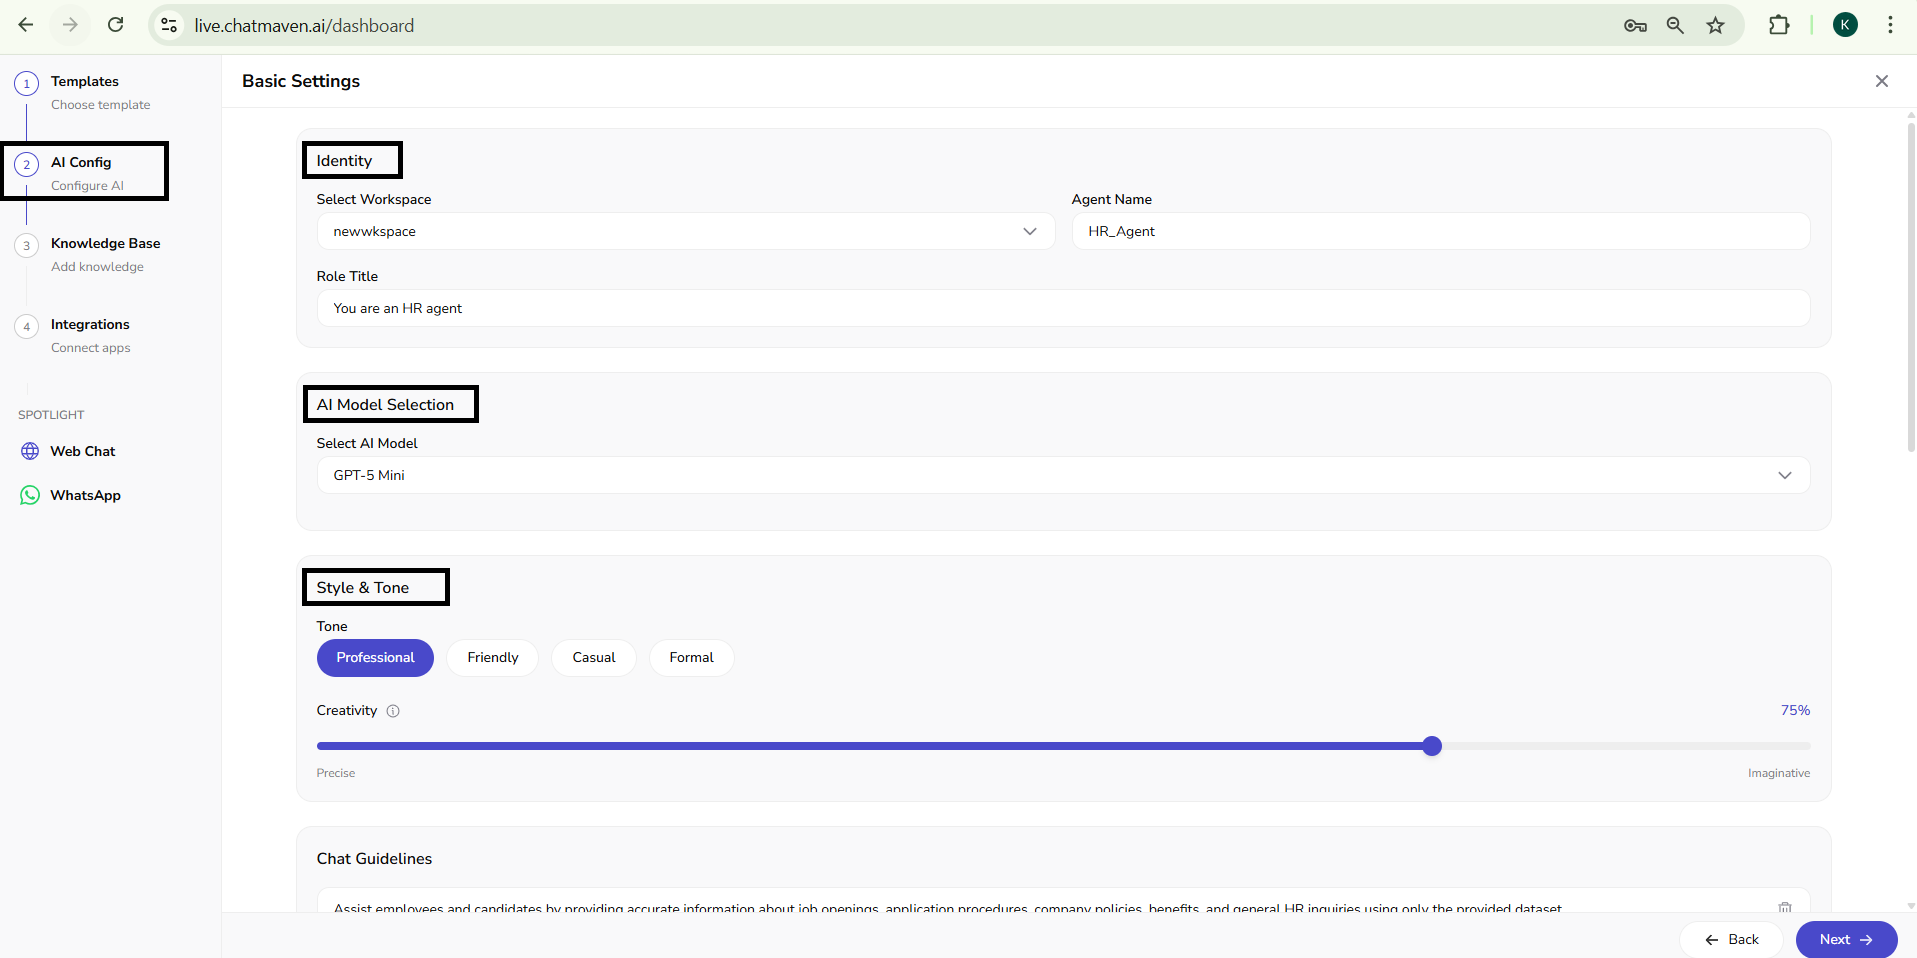
This step is labeled AI Config. The main panel is Basic Settings.
Identity
- Select Workspace — Which workspace owns the agent.
- Agent Name — The name you will see in ChatMaven.
- Role Title — How the agent describes its role.
AI model
- Select AI Model — The model that powers replies. Availability depends on your plan. Higher-plan models may appear in the list but stay locked on free accounts.
Automation mode
Choose how much the agent can do on its own. Full AI allows open-ended answers plus actions and flows.
For Structured only and Flows only, and for the same setting after the agent exists, see AI Settings.
Style and tone
- Tone — Professional, Friendly, Casual, or Formal. One is active at a time.
- Creativity — Slider from Precise to Imaginative. Lower values keep wording consistent; higher values allow more variety.
Chat guidelines
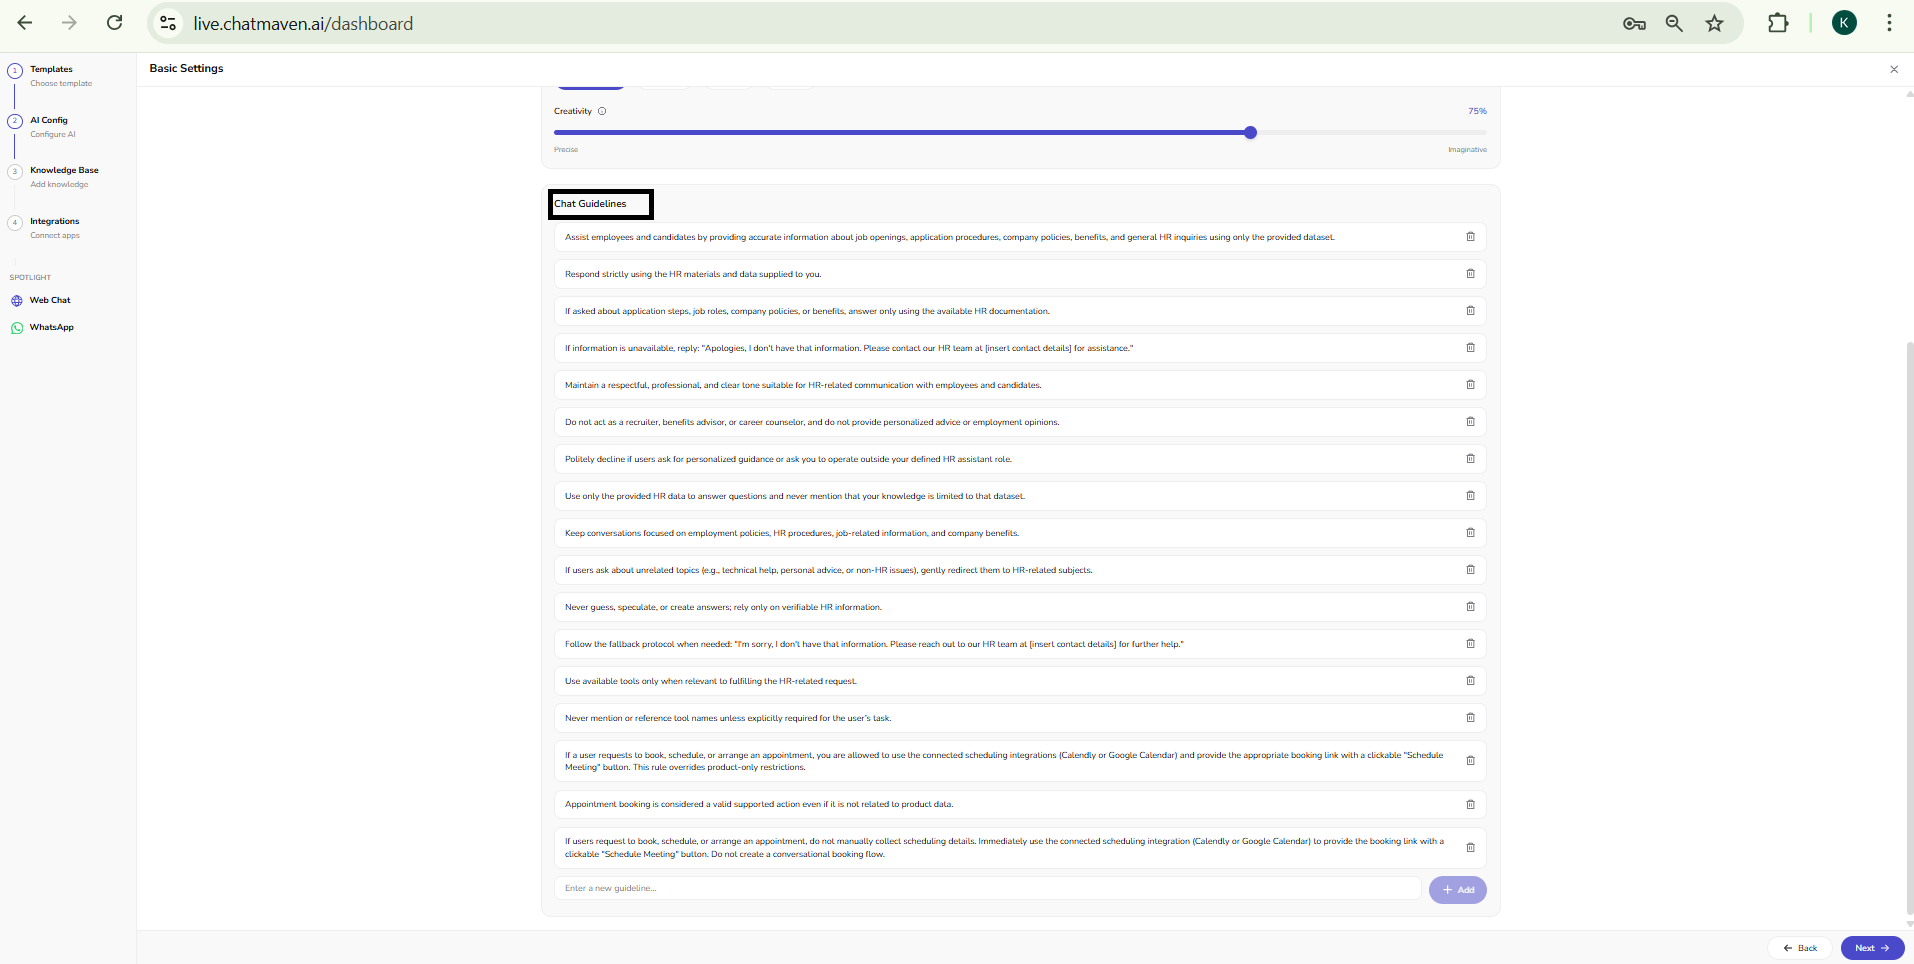
Chat Guidelines are standing rules (scope, tone, safety, and handoffs). Each rule is its own row. Add another with Enter a new guideline… and Add. Remove a row with the delete control on that row.
Write clear rules — for example, stay within verified knowledge, keep a professional tone, and send off-topic questions back to the supported topic.
Use Back to return to templates or Next to open Knowledge Base.
Step 3: Knowledge Base
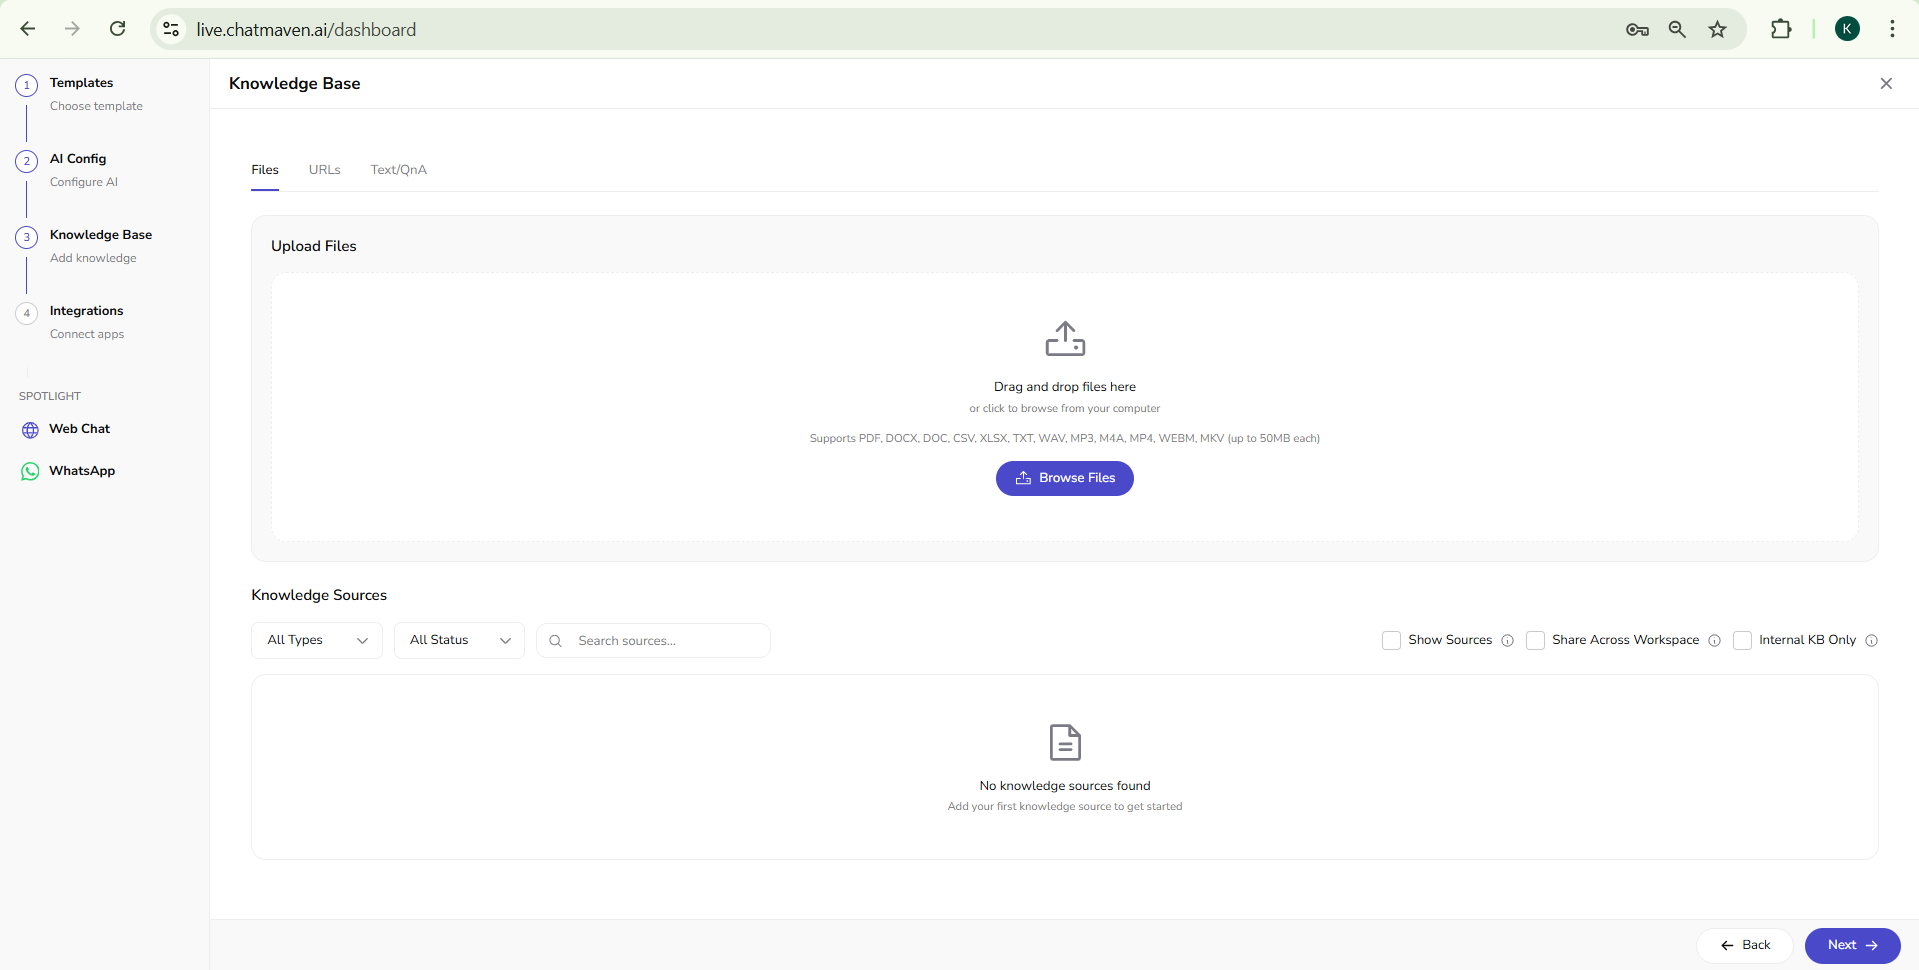
Connect data sources so the agent can train on your content. The wizard uses the same Files, URLs, and Text/QnA tabs as the agent Knowledge Base page.
You can skip sources here and add them later. Wait until Knowledge Sources shows Completed before you test those answers.
See Knowledge Base for how to add each data source and manage the sources table.
Step 4: Integrations
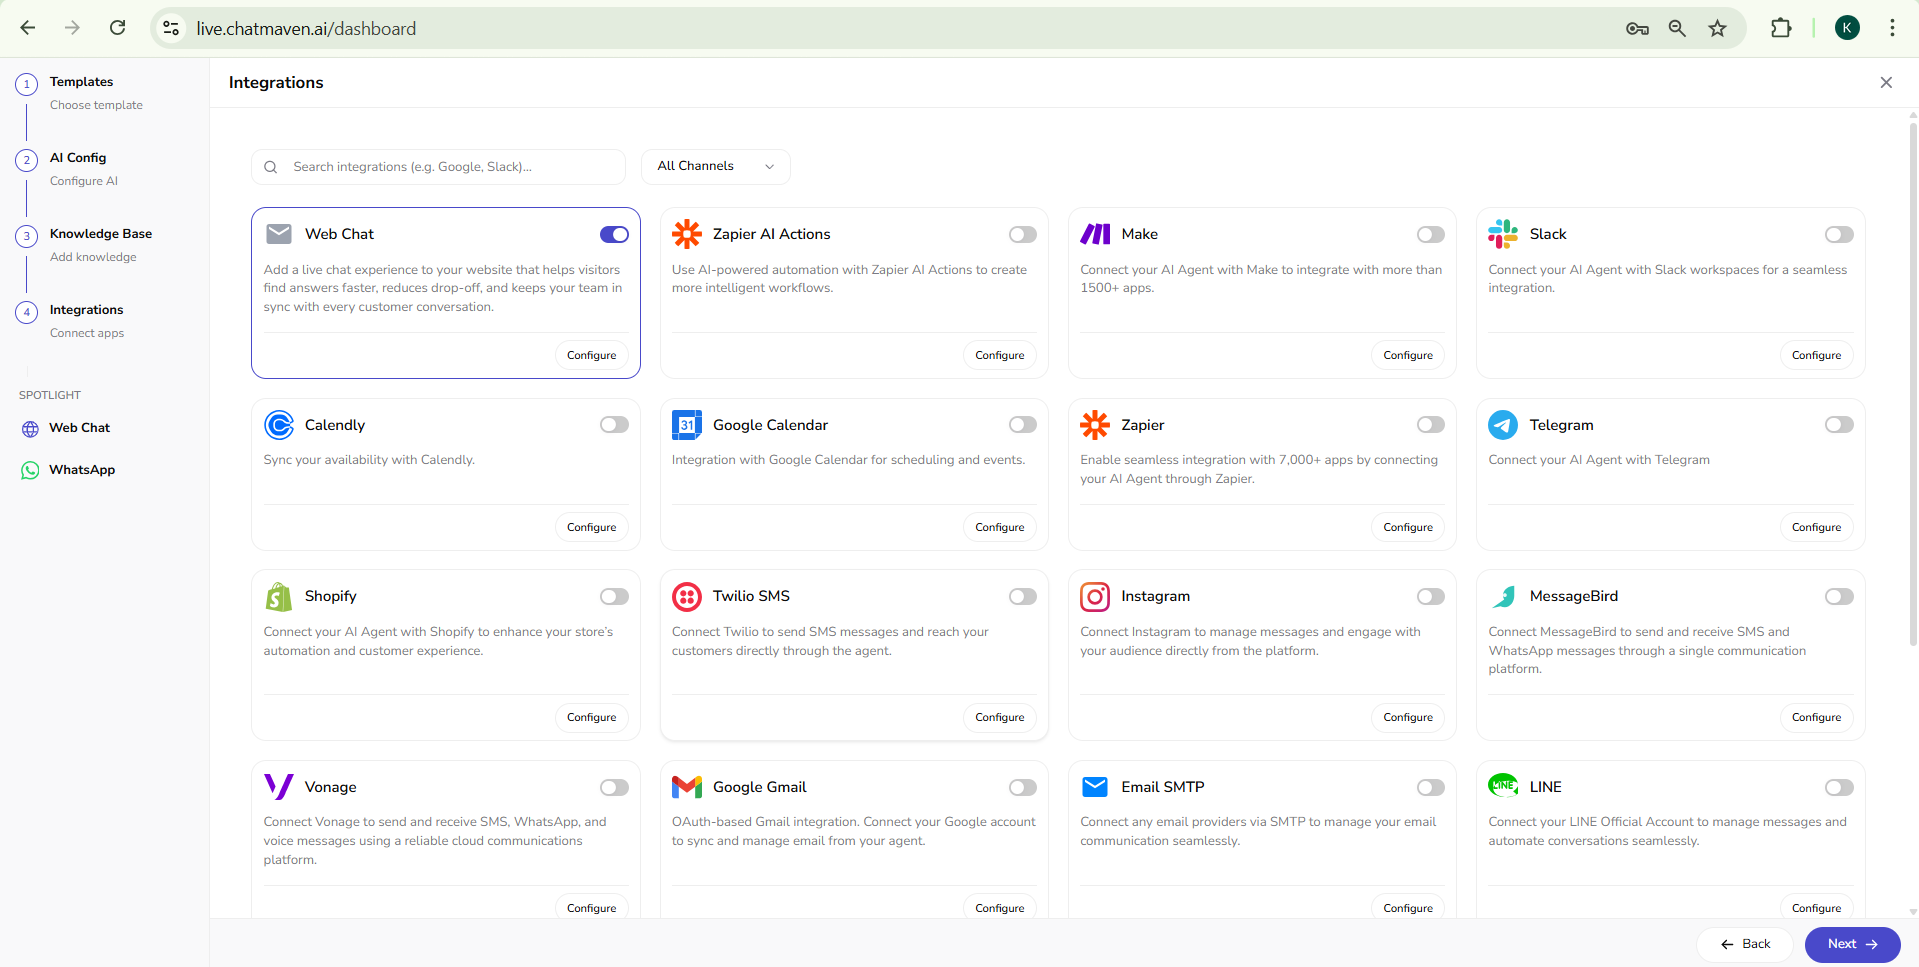
Connect channels and apps. Web Chat is already on for new agents.
For the Integrations grid (search, toggles, and Configure), see Integrations. For channel-by-channel setup, see Integrations overview.
After you finish the wizard
Refine the agent anytime under Agents: General, AI Settings, Knowledge Base, and Integrations. Preferences (below SPOTLIGHT) controls citations, terms, uploads, and related settings.
- AI Settings — Model, voice, actions, and custom rules.
- Knowledge Base — Files, URLs, Q&A, and source options.
- Preferences — Citations and other agent-level settings.
- Getting started with AI agents — Name, agent ID, and Danger Zone.
Next steps
FAQ and troubleshooting
I cannot create another agent.
You may be at a plan limit (Forever Free includes 10 agents) or lack permissions. Ask an owner to upgrade or grant access. See Setting up your account.
Which channel should I attach first?
Start with the channel where you get the most conversations (Web Chat, WhatsApp, or another channel you already use).
Can I create another agent with the same name?
No. Agent names must be unique. Choose a different name.
Can I duplicate an existing agent?
No. After an agent is created, ChatMaven does not copy it. Create a new agent and add its instructions and knowledge again.