
Google Gmail Quick Start
Connect your ChatMaven agent to Google Gmail using OAuth. After you connect, your agent can sync and manage email from Inbox with the permissions you approve in Google.
This integration uses Google’s sign-in window (not an SMTP app password). If you prefer to send mail via Gmail using SMTP and an app password, see Gmail SMTP.
A Google Gmail card that is turned on, a Google account linked on the Setup tab, and email available to your agent through ChatMaven.
Video Walkthrough
Watch the Walkthrough below, or follow the numbered steps under Connect Google Gmail.
What you need
- A ChatMaven account
- A Google / Gmail account you are allowed to connect
- Pop-ups allowed for your ChatMaven site (Google opens a small window for sign-in)
Connect Google Gmail
Follow the steps below with screenshots.
Step 1. Open Integrations
- Sign in to ChatMaven and open Agents in the top navigation.
- Select the agent that should use Gmail.
- In the left sidebar, open Integrations.
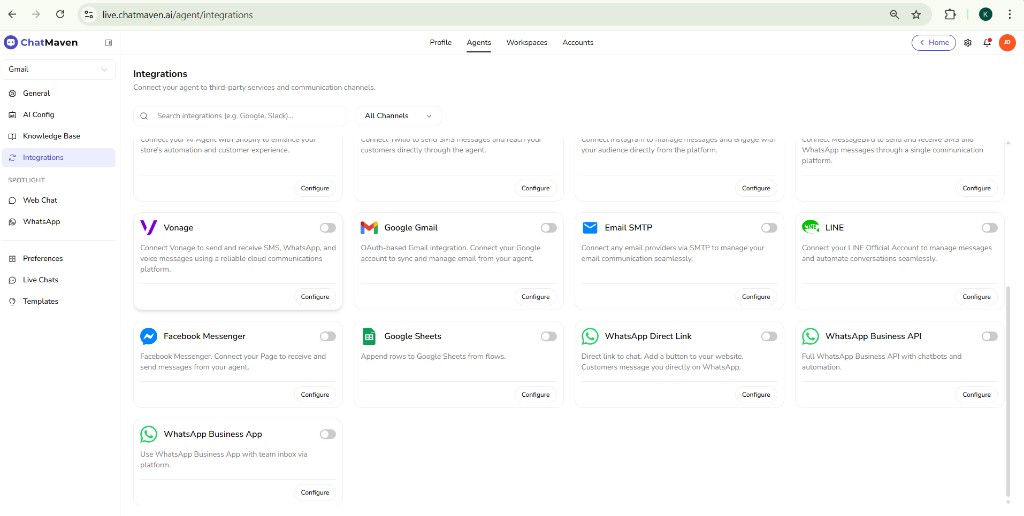
You’ll see the integrations grid, including Google Gmail.
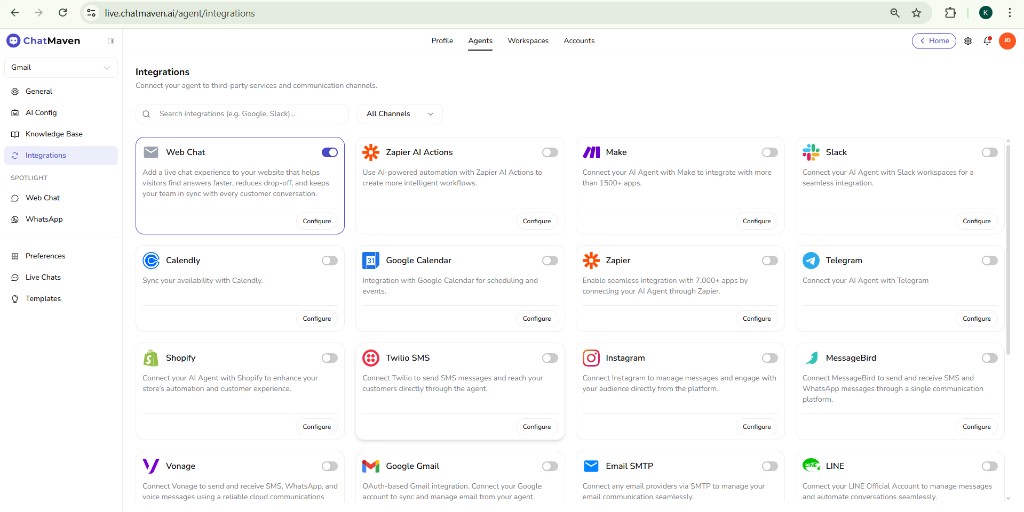
Step 2. Turn on Google Gmail and open Configure
- Find the Google Gmail card.
- Switch the integration on (toggle in the top-right of the card).
- Click Configure to open the Gmail connection panel.
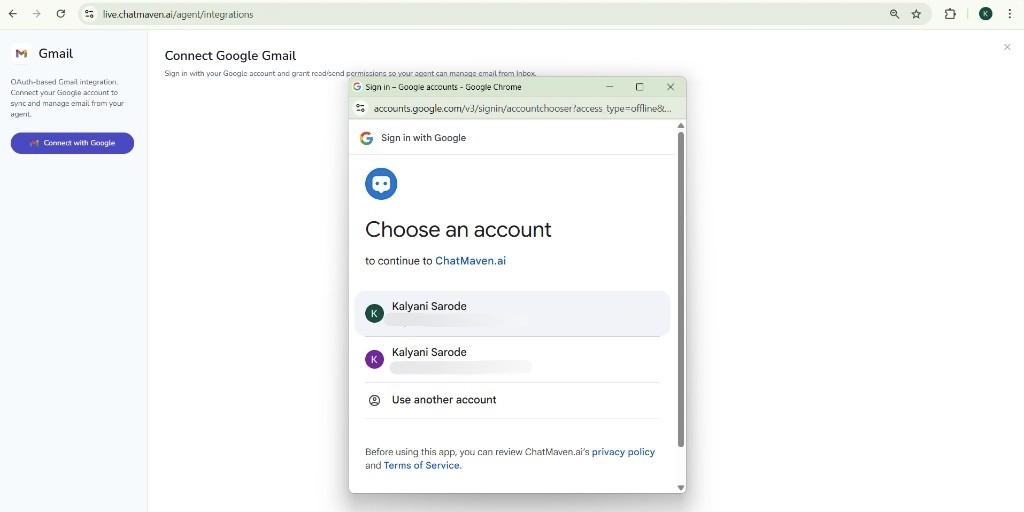
Step 3. Connect with Google and choose an account
- In the Gmail panel, open the Setup tab if needed.
- Click Connect with Google.
- In the Google pop-up, select the Google account you want to link to this agent (or use Use another account).
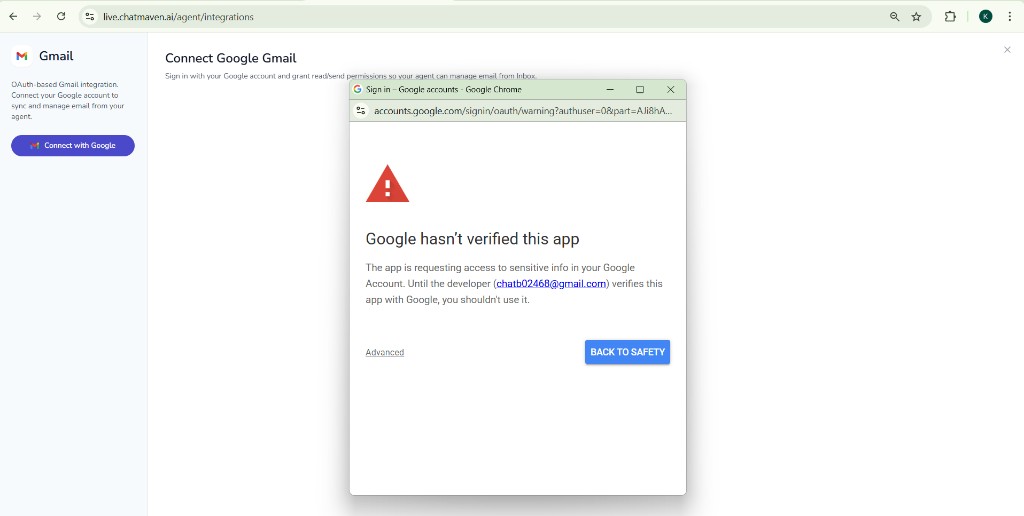
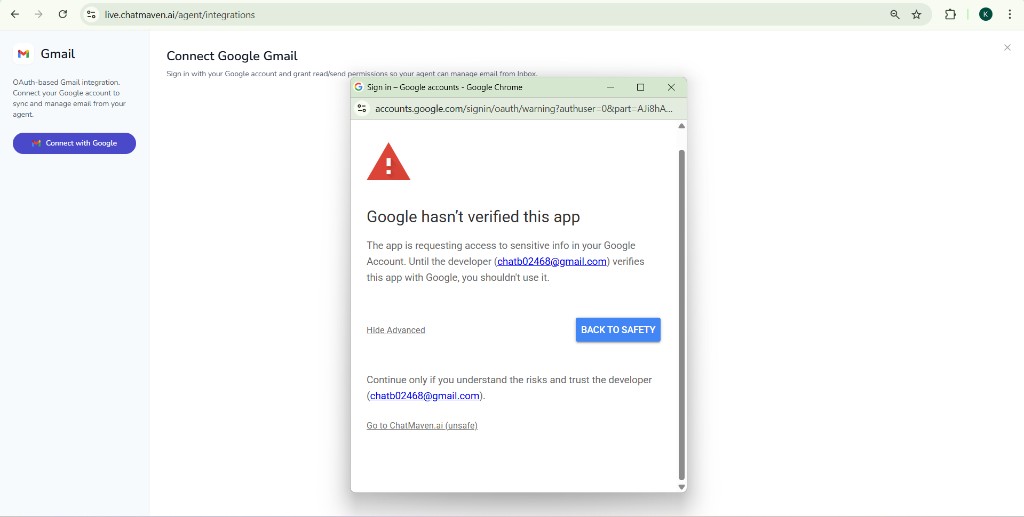
Step 4. If Google shows “This app isn’t verified” (first screen)
If you see Google hasn’t verified this app, click Advanced in the bottom-left of the pop-up. (Do not use BACK TO SAFETY if you want to continue the integration.)
Step 5. Continue past the warning
After Advanced expands, read the notice, then click Go to ChatMaven.ai (unsafe) (or the similar link shown) only if you trust ChatMaven and intend to connect.
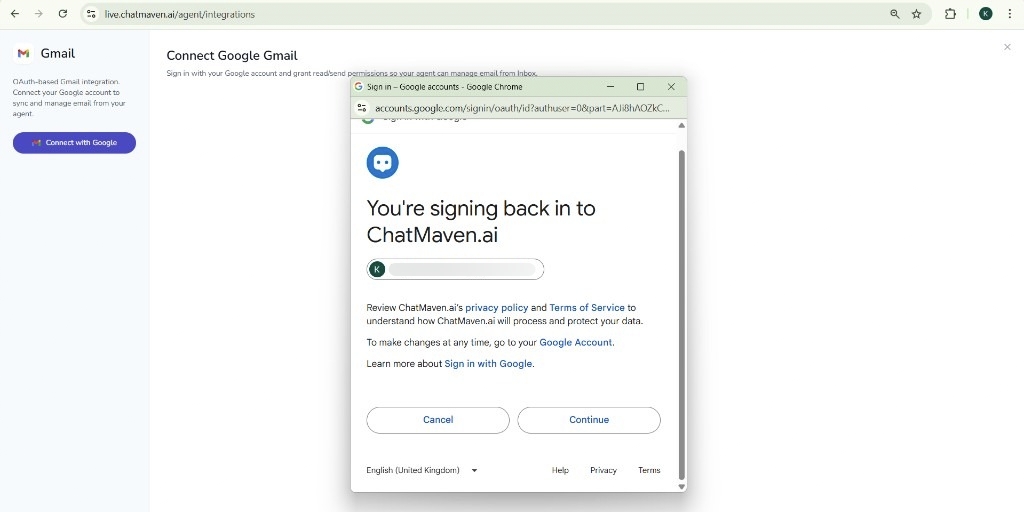
Step 6. Confirm sign-in with Google
When Google shows You’re signing back in to ChatMaven.ai, review the account shown, then click Continue.
Step 7. Trust the app and approve access
On the screen that asks you to trust ChatMaven.ai (and any permission lists Google shows), review the details, then click Continue until Google finishes the flow.
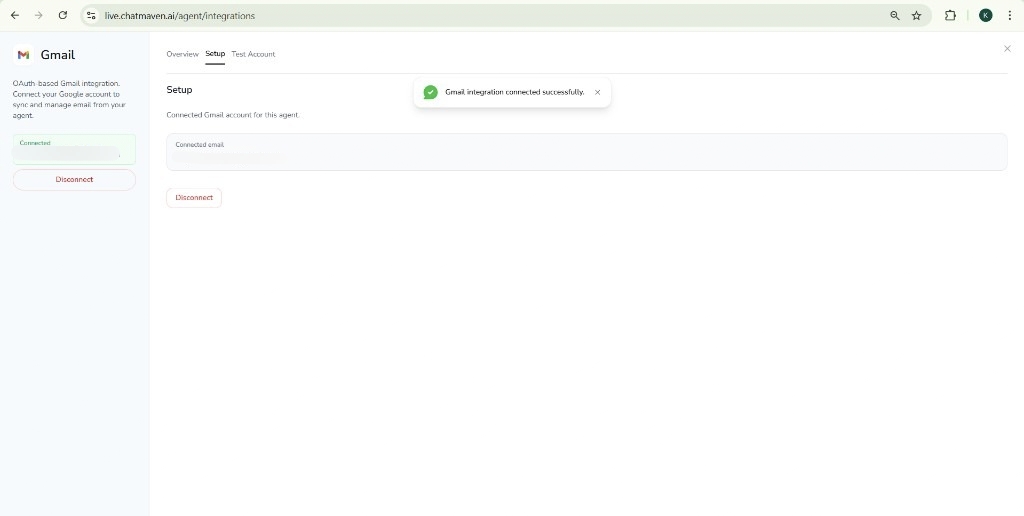
Step 8. Confirm Gmail is connected in ChatMaven
You should return to ChatMaven with a success message. On the Setup tab, check Connected email and the Connected status in the sidebar. Use Disconnect if you need to change accounts later.
Quick recap
| Step | Where | What to do |
|---|---|---|
| 1 | ChatMaven | Agents → agent → Integrations |
| 2 | Integrations | Google Gmail → on → Configure |
| 3 | Gmail panel | Connect with Google → pick account |
| 4 | Unverified warning → Advanced | |
| 5 | Go to ChatMaven.ai (unsafe) | |
| 6 | Continue on sign-back-in screen | |
| 7 | Continue on trust / permissions | |
| 8 | ChatMaven | Confirm Setup shows connected email |
FAQ and Troubleshooting
Why are messages not arriving on the platform?
Check the connected account
Confirm the correct Gmail address appears on the Setup tab and that the integration toggle stays on.
Pop-up blockers
If nothing happens after Connect with Google, allow pop-ups for your ChatMaven domain and try again.
Why does Google say the app isn’t verified?
That message appears for some apps until Google’s verification is complete. Use Advanced and Go to ChatMaven.ai (unsafe) as in Steps 4–5. If you are unsure, contact your workspace admin or ChatMaven Support before proceeding.
Why are contacts not receiving replies?
Confirm Gmail is connected for the agent you’re using and that you are sending from the expected channel in Inbox. For SMTP-only sending, see Gmail SMTP.
Need help?
- ChatMaven Support
- Community Forum
- Gmail SMTP (alternative) — connect Gmail using an app password and SMTP instead of OAuth