Zapier AI Actions
Connect ChatMaven to Zapier AI Actions using an MCP (Model Context Protocol) URL. Once connected, your agent can run AI-powered actions—like sending emails via Gmail—directly from the chat. This guide walks you through creating your accounts, generating the MCP URL in Zapier AI Actions, and pasting it into ChatMaven.
Watch the integration video
Watch the video below for a full Walkthrough of connecting Zapier AI Actions to ChatMaven. You can follow the written steps in this guide as well.
Open the Zapier AI Actions integration video on Google Drive in a new tab if the player above does not load.
After following this guide, your ChatMaven agent will be able to send emails from your chats using Gmail (and any other AI actions you add in Zapier AI Actions).
What you need
- A ChatMaven account
- A Zapier AI Actions account
- A Gmail account (for the Gmail send email action example below)
Part 1 — ChatMaven: Get to the integration
Step 1. Create an account on ChatMaven
If you don’t have one yet, sign up at ChatMaven and create your account.
![Create ChatMaven account]
Step 2. Open Zapier AI Actions in ChatMaven
-
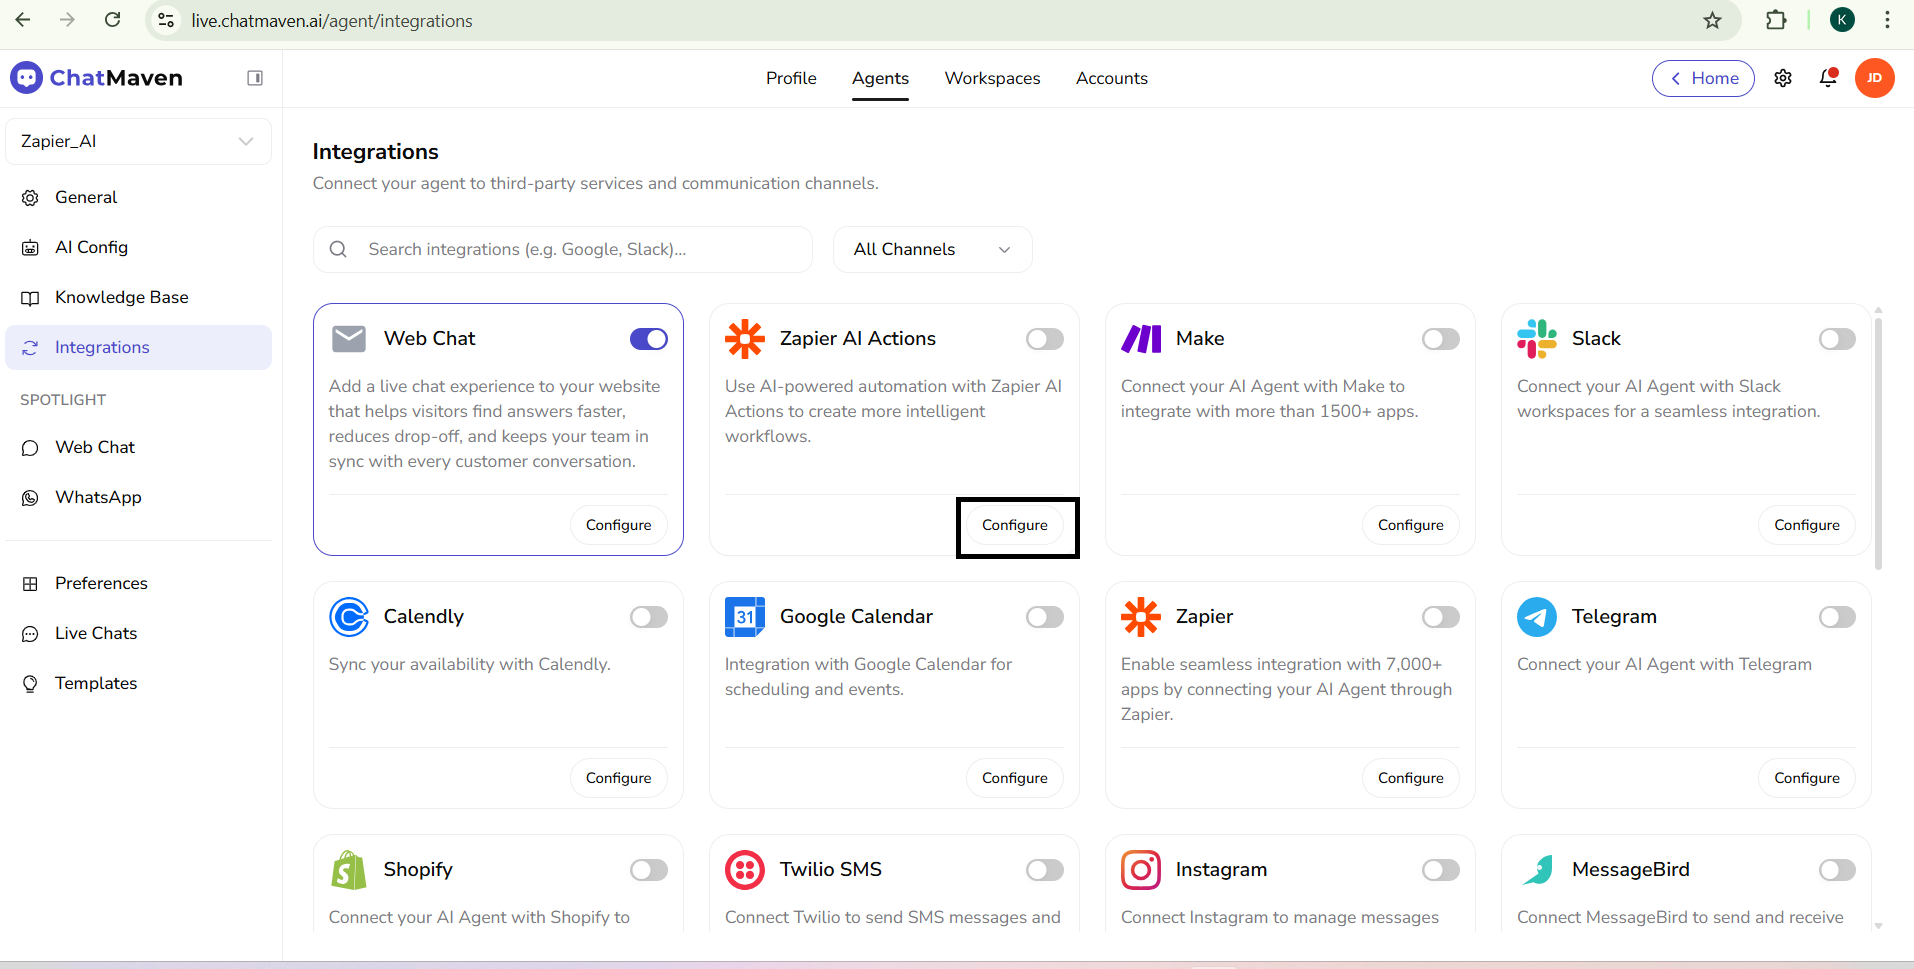
In ChatMaven, go to Settings → Agents → Integrations.

-
Find Zapier AI Actions and open it.
-c7378bb50b77d2b7ec3724fbbafa0cc2.png)
- Click the Configure tab.
Step 3. Connect other automation provider
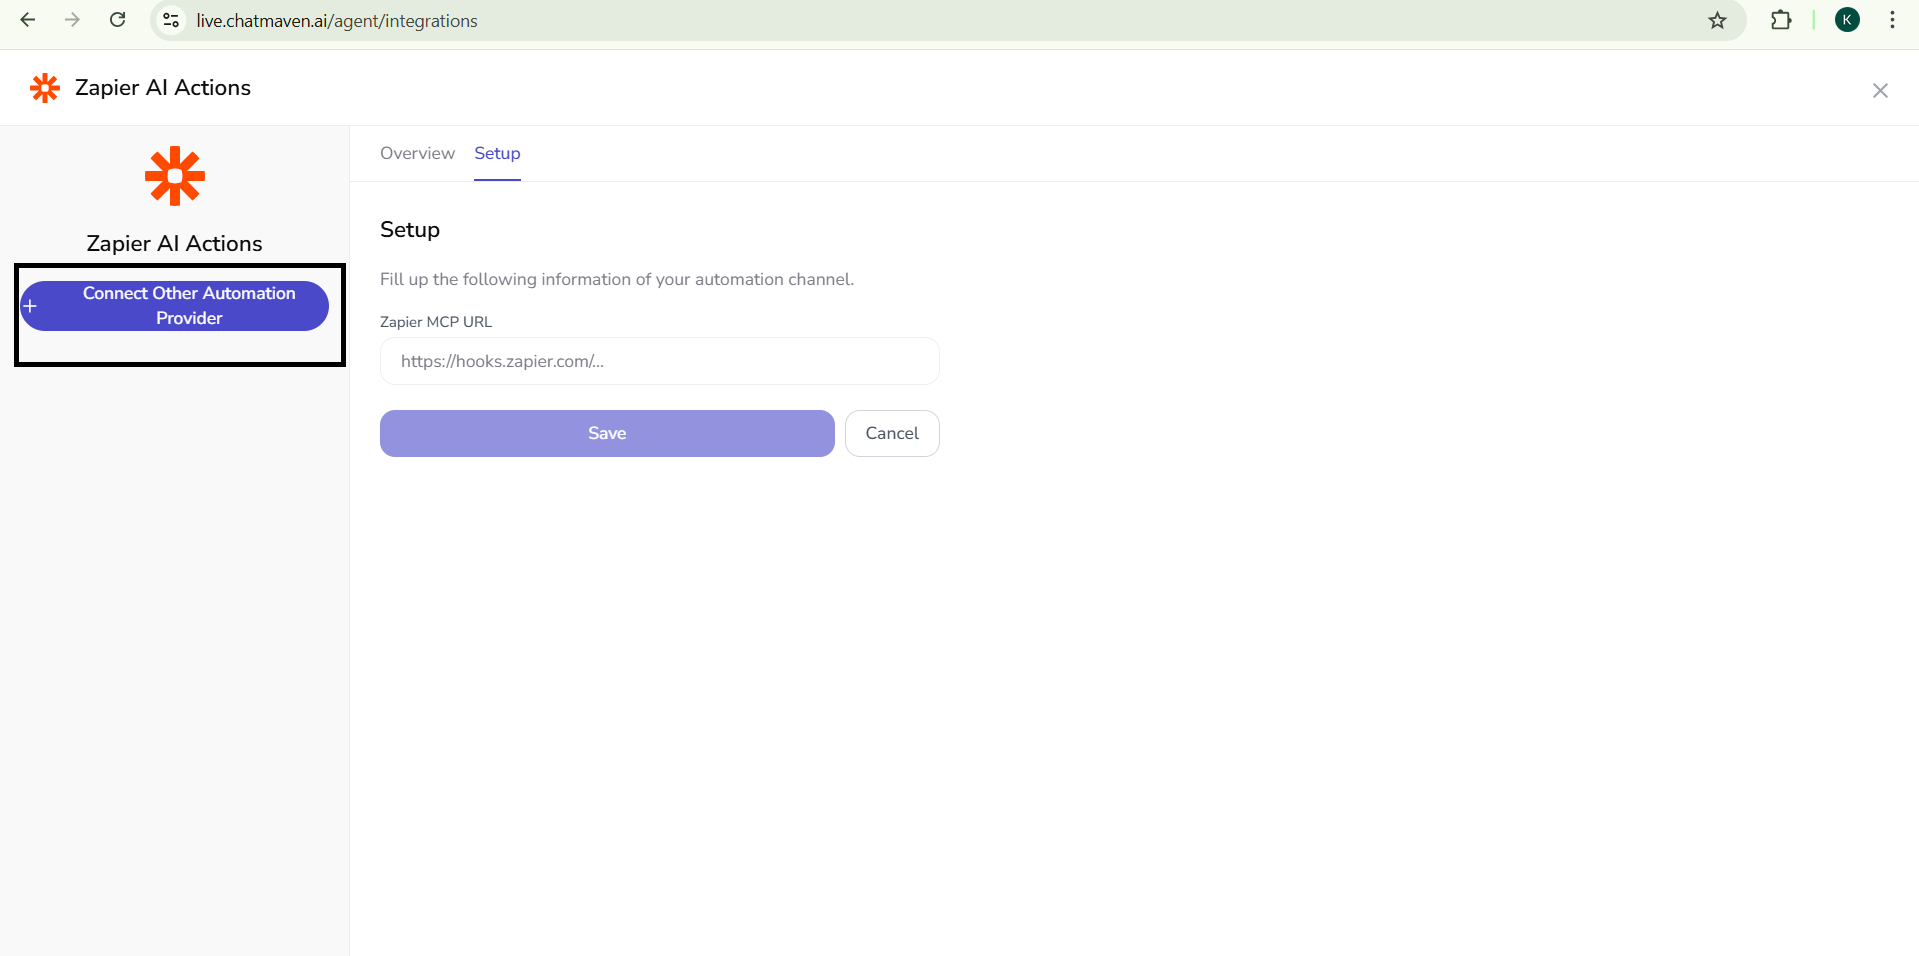
On the Zapier AI Actions integration page, click Connect other automation provider. You will need the MCP URL from Zapier AI Actions (you’ll get this in Part 2).
Part 2 — Zapier AI Actions: Create your action and get the MCP URL
Step 4. Create an account on Zapier AI Actions
Sign up or log in at Zapier AI Actions if you haven’t already.
Step 5. Open the MCP tab and generate the URL
- In Zapier AI Actions, look at the left panel.
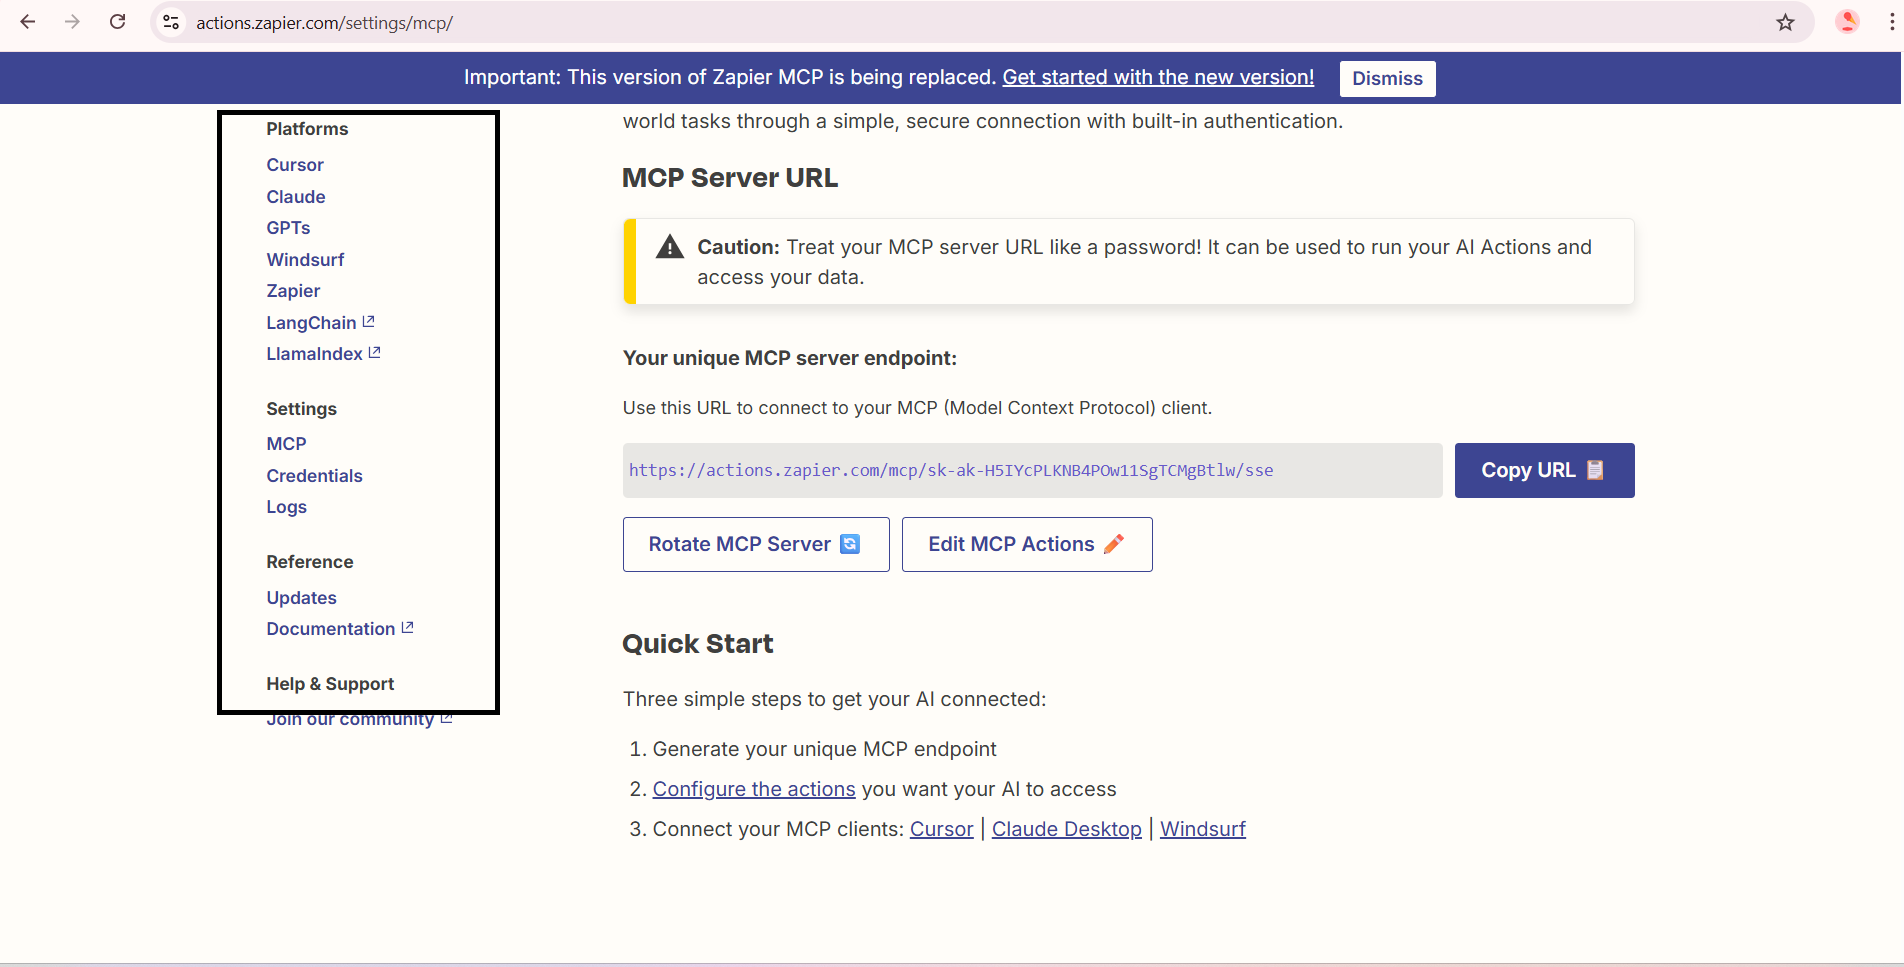
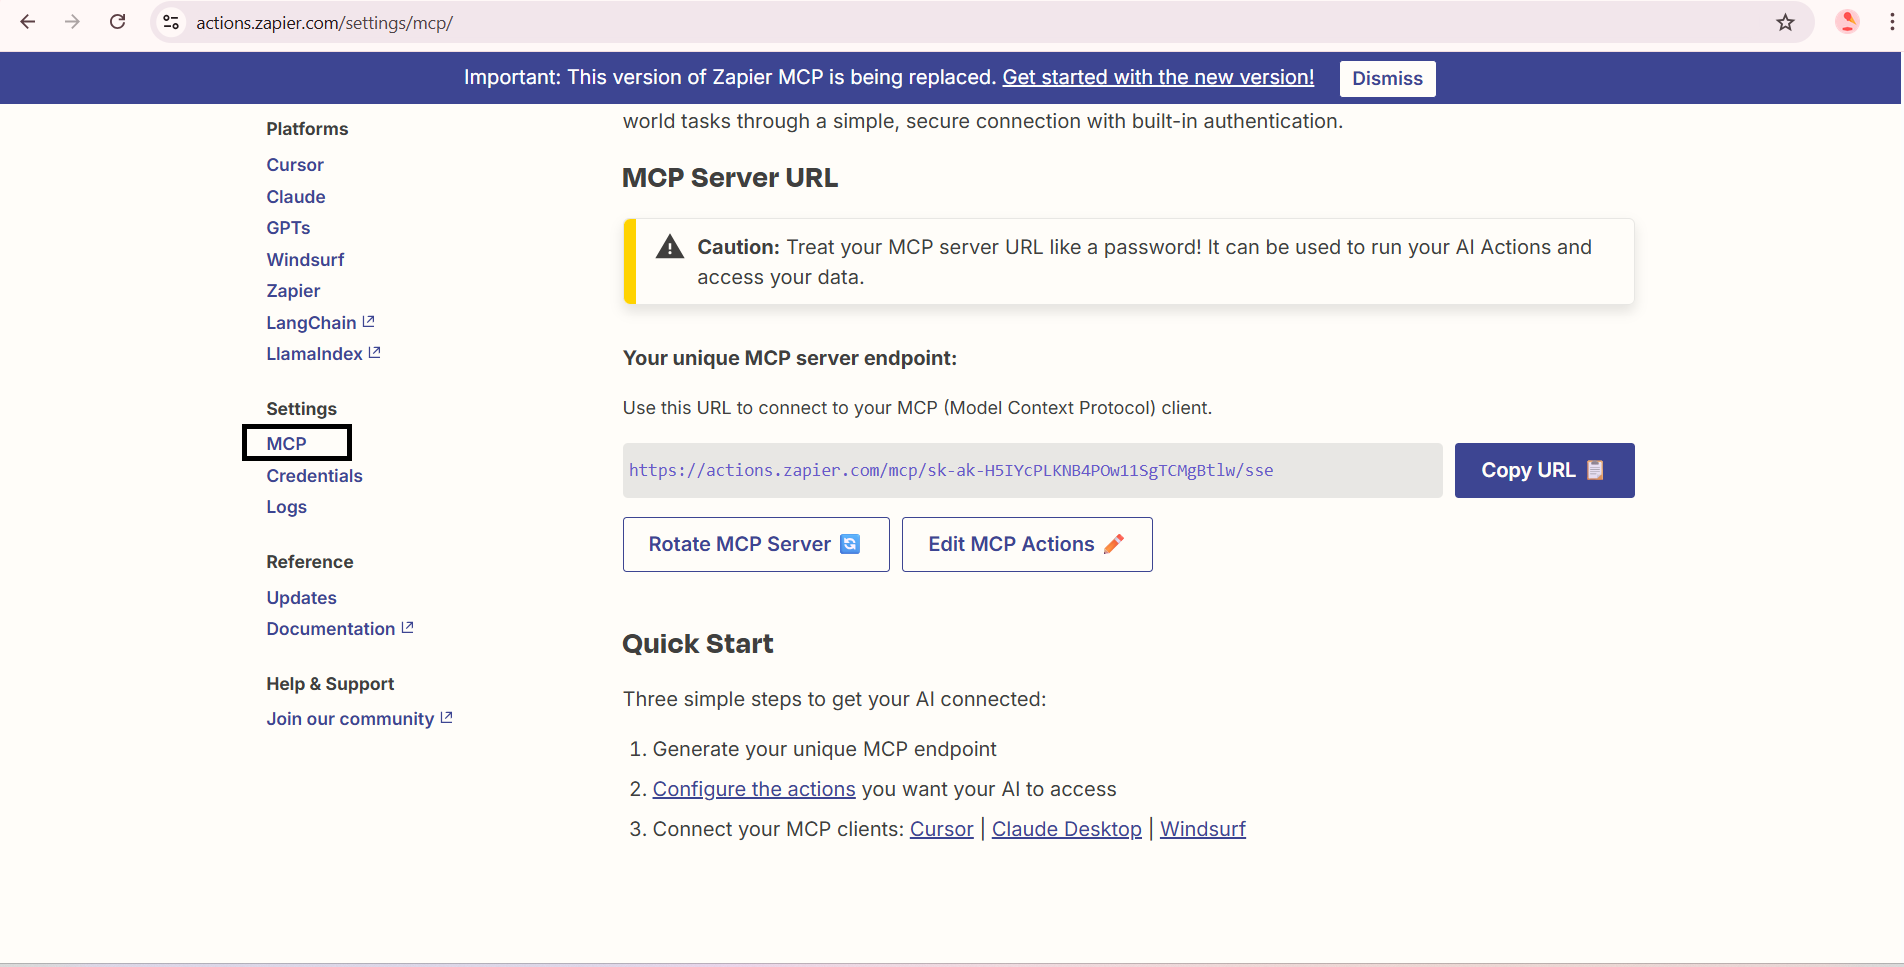
- Click the MCP tab.
- Click the blue Generate URL button.
- The MCP URL will be generated—copy this URL; you’ll paste it into ChatMaven later.
-bbf340304fb862f8aa2b45aee09c175a.png)
Step 6. Edit MCP actions and add a new action
-
Below the URL box, click Edit MCP actions.
-
Click Add new action (below).
Step 7. Add the Gmail “Send email” action
-
In the search box, type Gmail.
-
From the dropdown, select Gmail – Send email.
-
Click Connect new Gmail (or the Gmail connection option shown).
-
Choose the Gmail account you want to connect → Continue.
-
Click Select all and Continue.
-
Your Gmail account is now connected to the action.
Step 8. Require preview and enable the action
-
Scroll down and find the checkbox Require preview before running AI Action.
-
Check the box.
-
Click Enable action.
Your action is now created and enabled.
Step 9. Copy the MCP URL
Go back to the MCP tab (from Step 5) and copy the MCP URL that was generated. You’ll paste this into ChatMaven in the next part.
Part 3 — Connect ChatMaven to Zapier AI Actions
Step 10. Paste the MCP URL in ChatMaven
-
Return to ChatMaven → Settings → Agents → Integrations → Zapier AI Actions → Configure.
-
Where you see the Zapier AI Action integration field (e.g. “Connect other automation provider” or MCP URL field), paste the MCP URL you copied.
-
Save or Connect.
Step 11. You’re done
Your Zapier AI Actions integration is now connected. You can send emails from your chats using the Gmail action you configured (and any other AI actions you add in Zapier AI Actions).
Quick recap
| Step | Where | What to do |
|---|---|---|
| 1 | ChatMaven | Create an account |
| 2–3 | ChatMaven | Settings → Agents → Integrations → Zapier AI Actions → Configure → Connect other automation provider (you’ll need the MCP URL) |
| 4 | Zapier AI Actions | Create/log in to your account |
| 5 | Zapier AI Actions | MCP tab → Generate URL → copy the MCP URL |
| 6 | Zapier AI Actions | Edit MCP actions → Add new action |
| 7 | Zapier AI Actions | Search Gmail → select Gmail – Send email → Connect new Gmail → choose account → Select all → Continue |
| 8 | Zapier AI Actions | Check Require preview before running AI Action → Enable action |
| 9 | Zapier AI Actions | Copy the MCP URL from the MCP tab |
| 10 | ChatMaven | Paste the MCP URL in Zapier AI Actions integration and save |
| 11 | — | Integration connected; you can send mail from chats |
Tips
- More actions: In Zapier AI Actions you can add multiple actions (e.g. other Gmail actions, Slack, calendars). Each will be available to your agent after you paste the same MCP URL in ChatMaven.
- Require preview: Keeping “Require preview before running AI Action” on adds a confirmation step before the action runs—useful for sensitive actions like sending email.
- Same MCP URL: You only need one MCP URL in ChatMaven; all actions you enable in that Zapier AI Actions MCP setup are available through that URL.
Troubleshooting
- MCP URL not working: Regenerate the URL in Zapier AI Actions (MCP tab → Generate URL) and paste the new URL in ChatMaven.
- Gmail not connecting: In Zapier AI Actions, disconnect and reconnect Gmail for the “Send email” action, and ensure you’ve selected the correct account and Select all permissions.
- Action not showing in chat: Confirm the action is Enabled in Zapier AI Actions and that you’ve saved the MCP URL in ChatMaven. Refresh or reconnect if needed.
Need help?
FAQ and troubleshooting
Zapier cannot authenticate to ChatMaven.
Regenerate credentials if needed and paste them exactly into Zapier’s connection dialog. Complete any 2FA or workspace selection steps in the OAuth window.
Actions time out or return partial data.
Reduce payload size, avoid long chains before the ChatMaven step, and use Zapier’s task history to see raw requests. Increase timeouts only if your process truly needs more time.
Can I map custom fields?
Use Zapier custom fields or formatter steps to match ChatMaven’s expected property names. Refer to the API or action help text for required keys.