Contacts Overview
The Contacts area is where you view and organize people who have interacted with your workspace. From one screen you can scope the list to an agent, limit by time, search, reuse saved segments, export or import data, and jump into a single contact for deeper edits.
Getting Here
Choose Contacts in the primary header next to Dashboard, Inbox, Analytics, and Broadcasts. No separate “contacts-only” sidebar is required—the list loads as soon as you land on the page.
Navigation
The layout is built around:
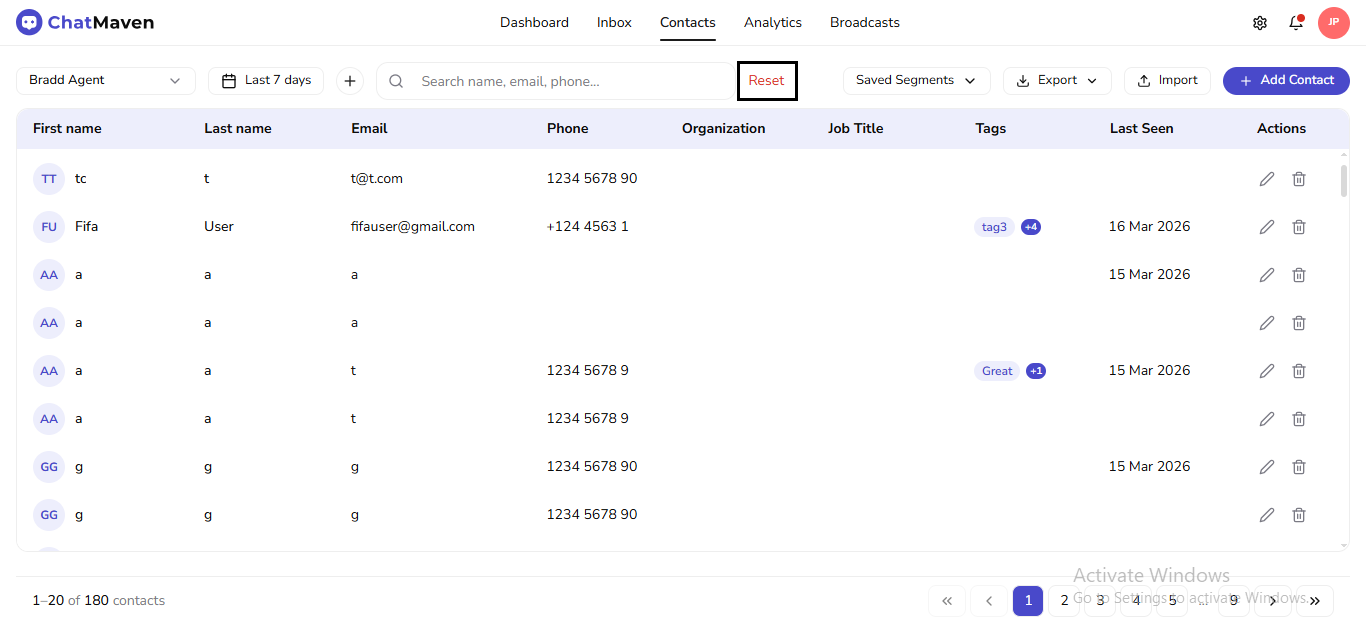
- Toolbar — scope, time range, filters, search, data in/out, and Add Contact
- Main grid — sortable-style columns (where enabled) and one row per person
- Saved segments — applied from the toolbar rather than a permanent left rail; see Segments for building and naming audiences
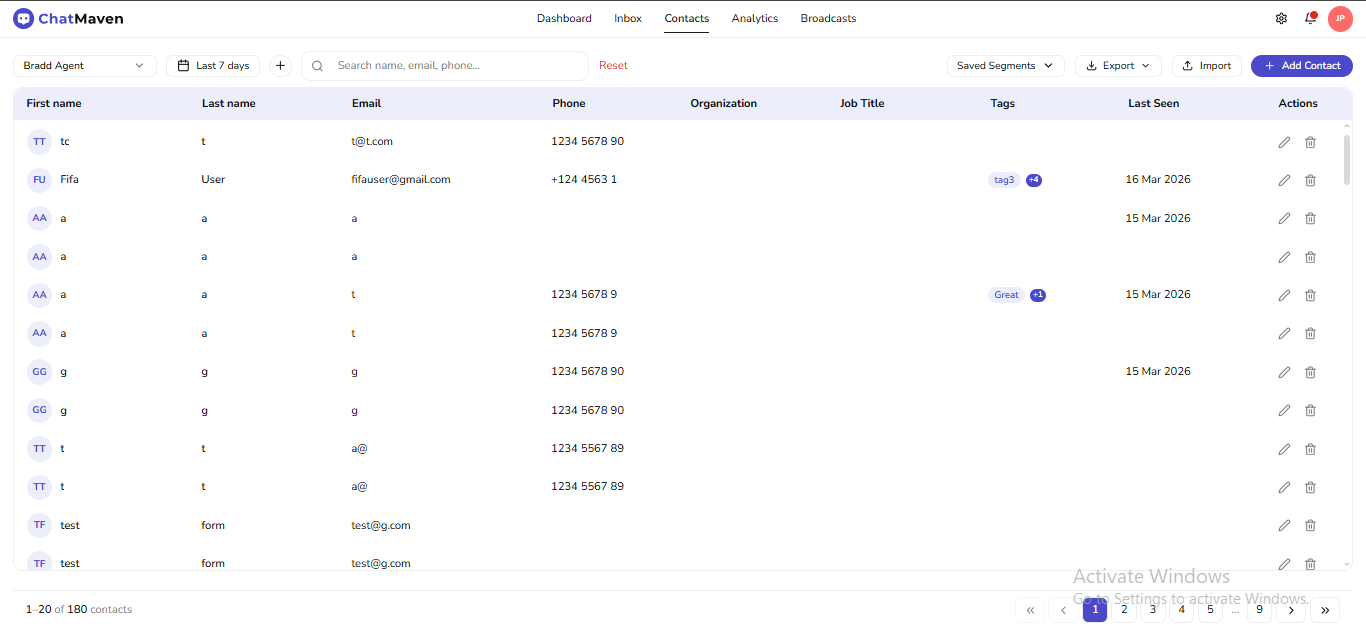
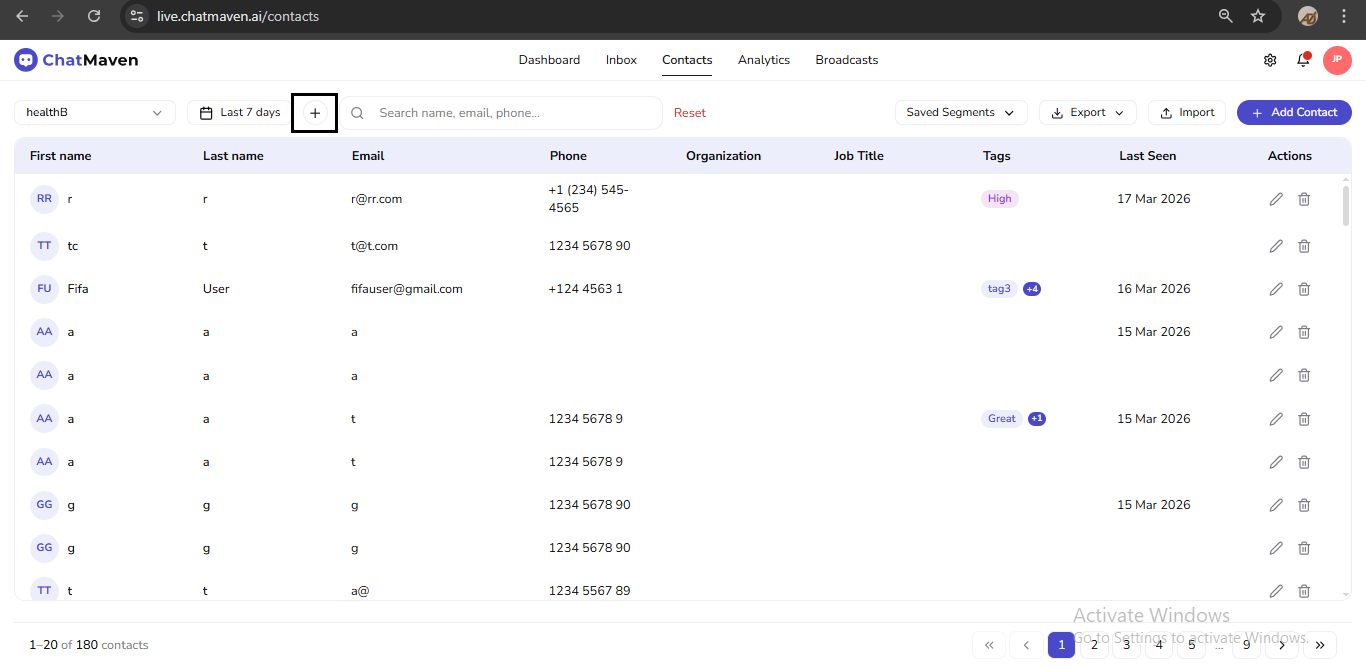
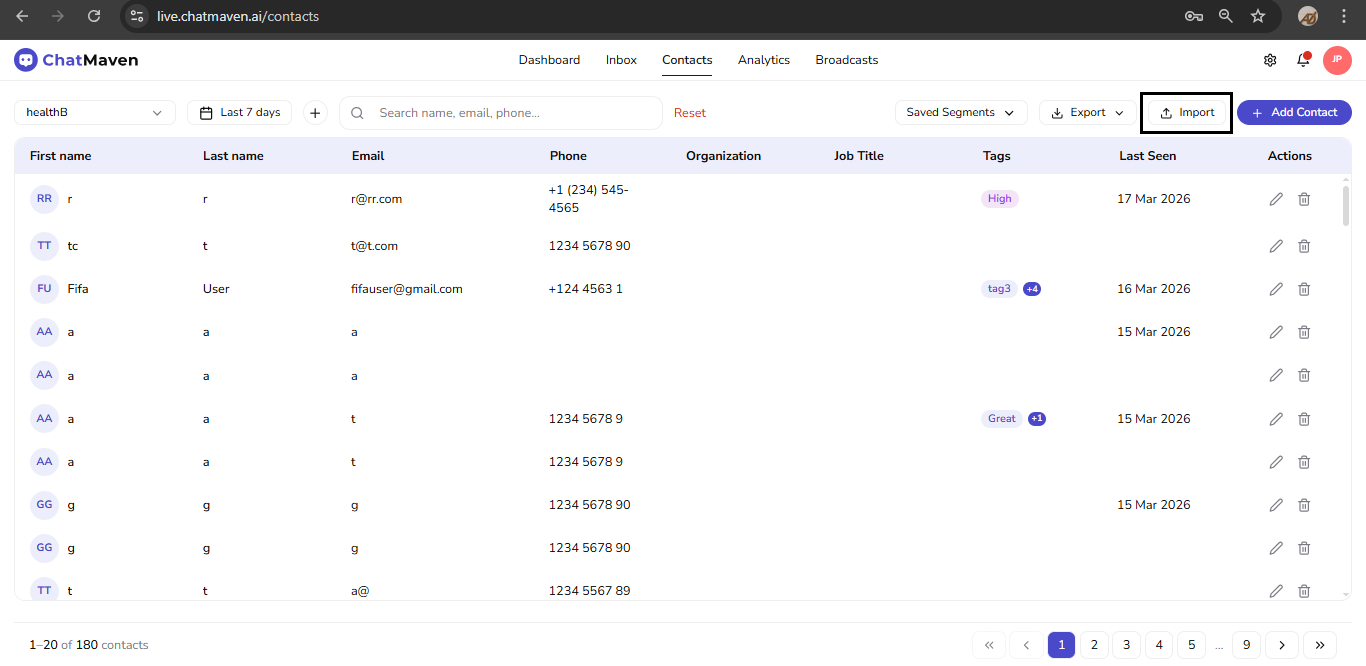
The full-page screenshot under Getting Here shows the toolbar, main grid, and footer together.
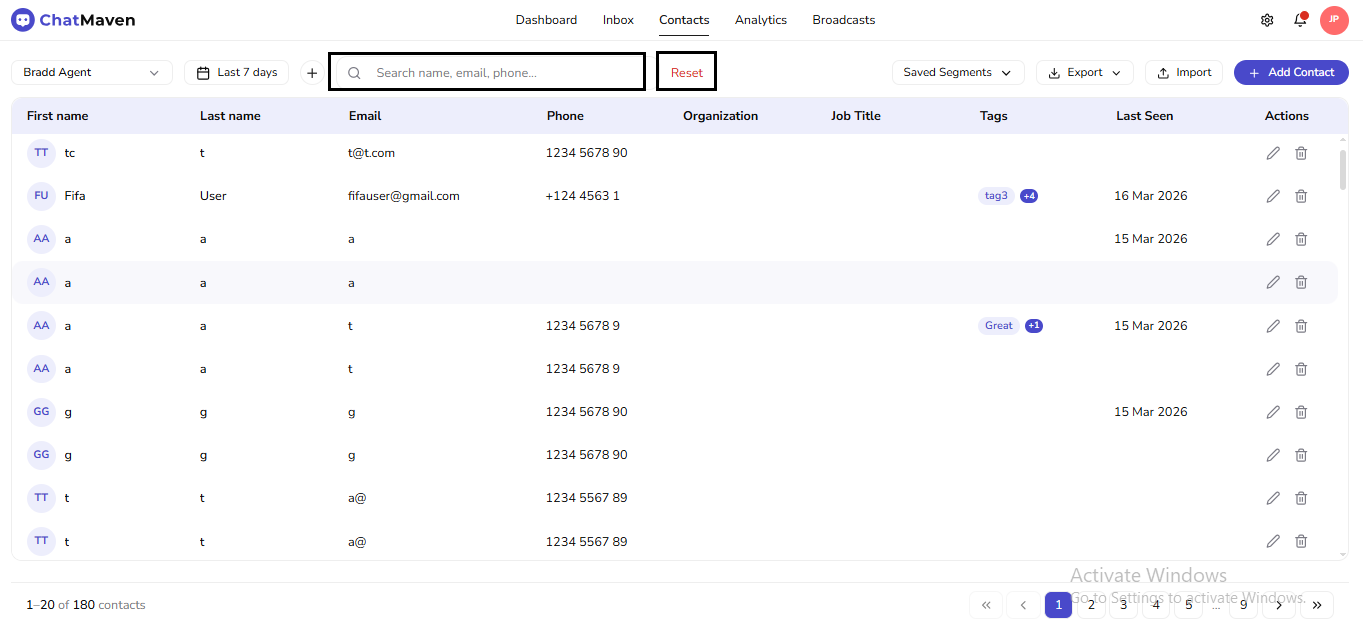
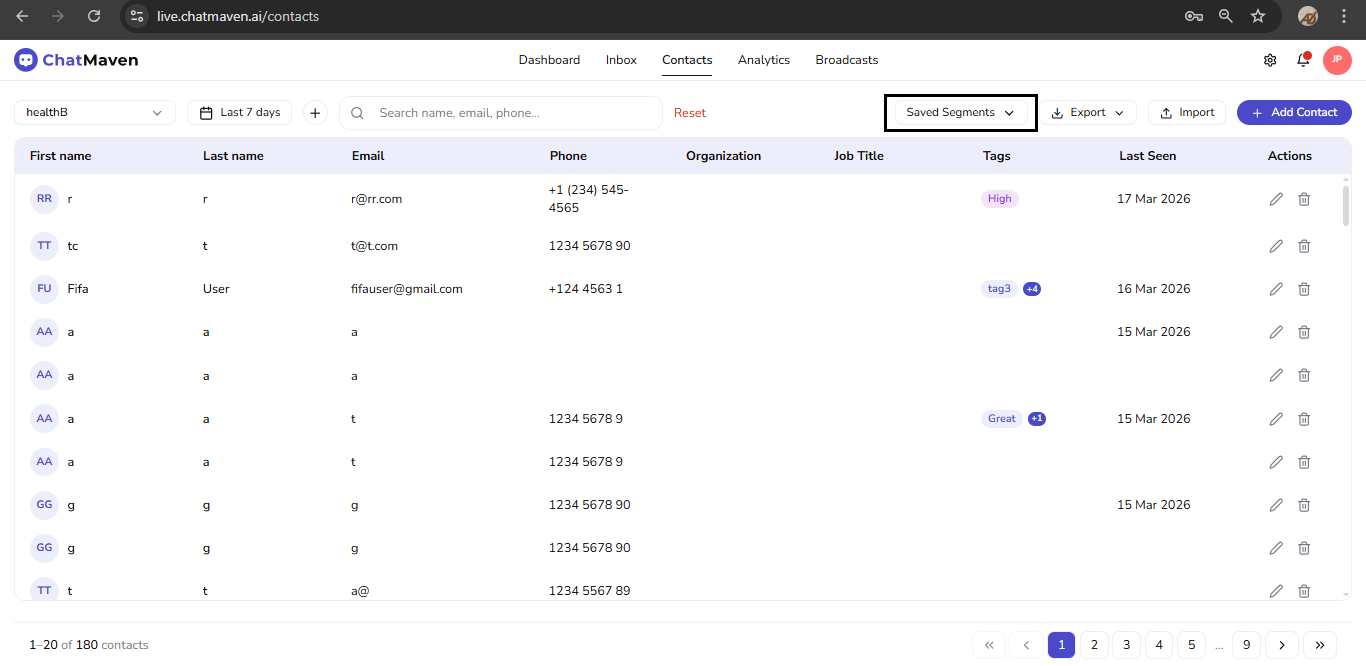
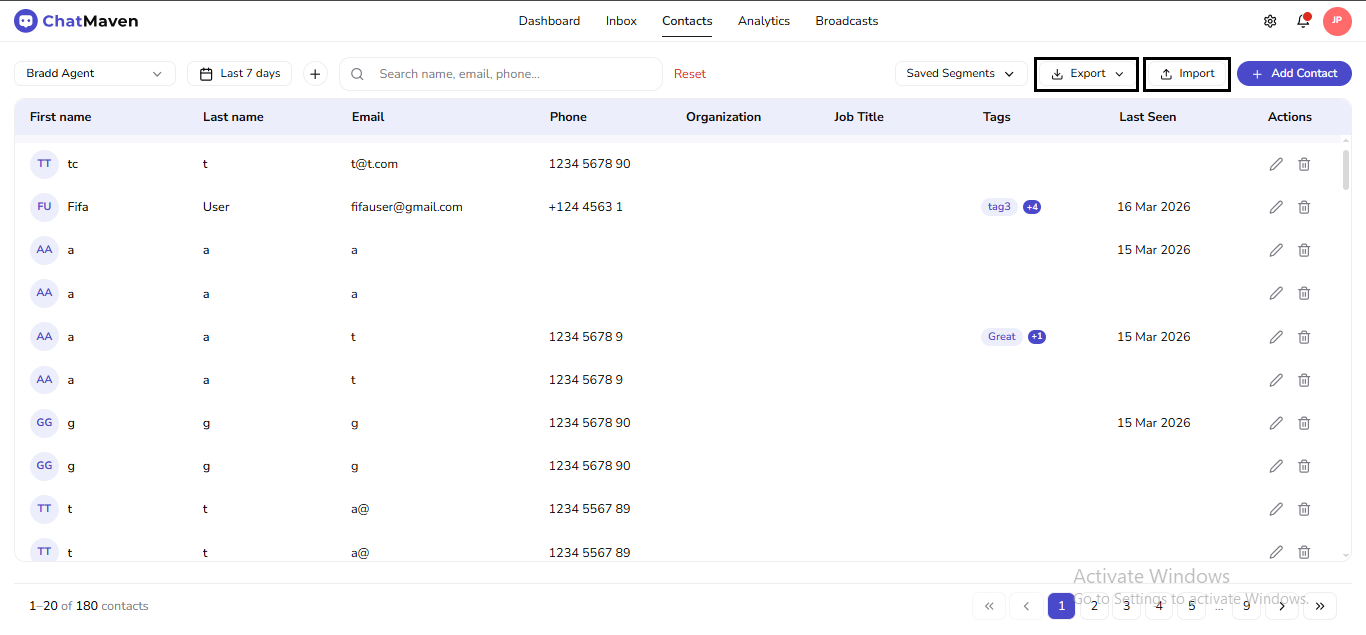
Contacts Toolbar
The toolbar gives you the main controls used to narrow and manage results:
-
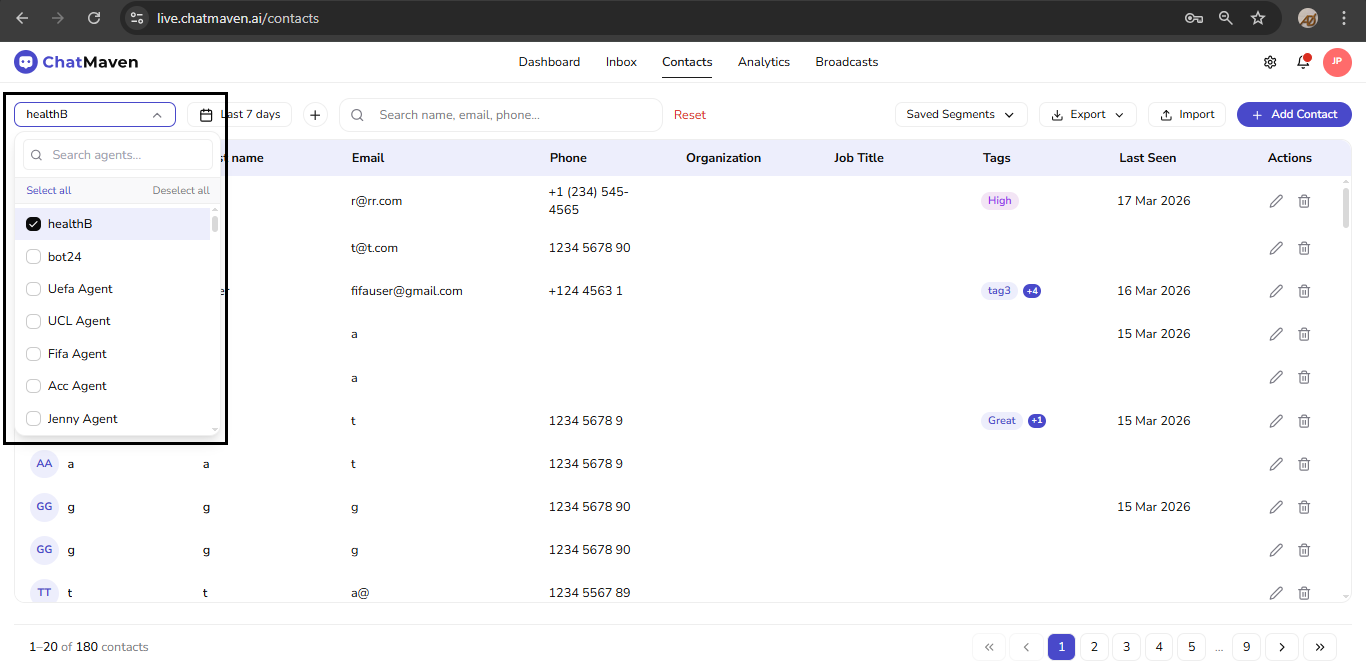
Agent menu: picks which agent the table is scoped to; the toolbar shows the current agent name. Open it to search the list (Search agents…), pick another agent, or use Select all / Deselect all when you need multi-agent selection.
-
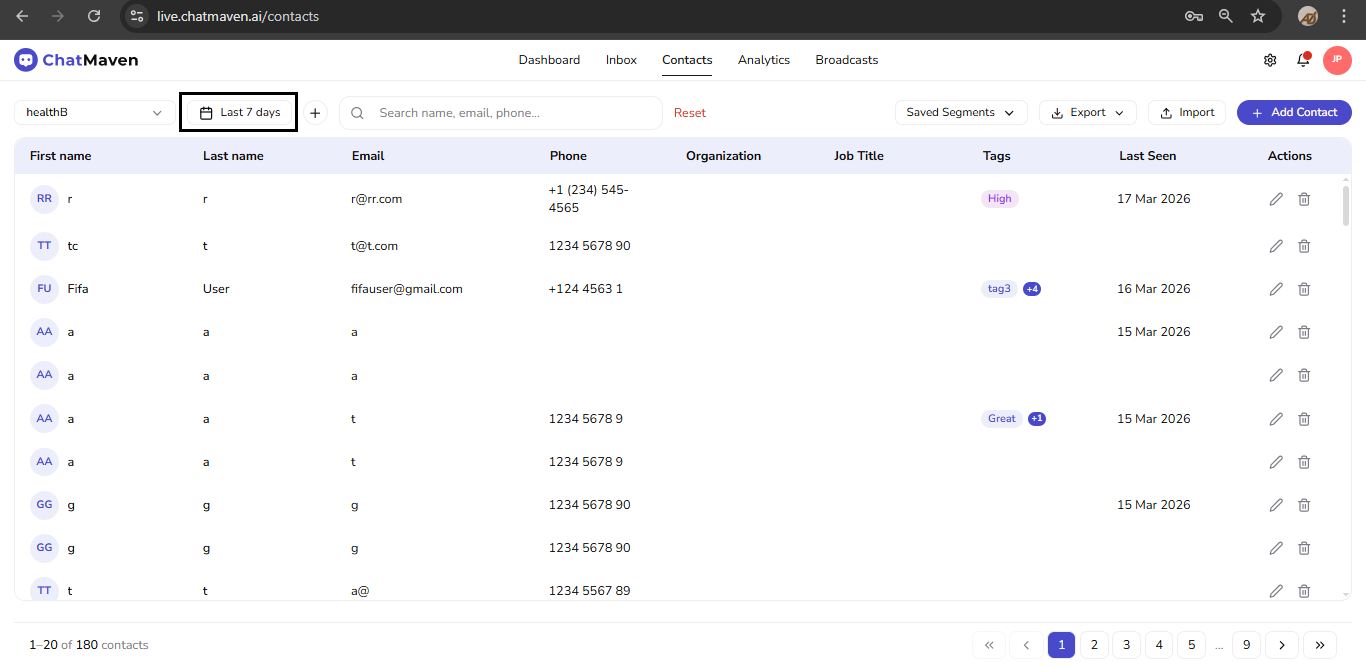
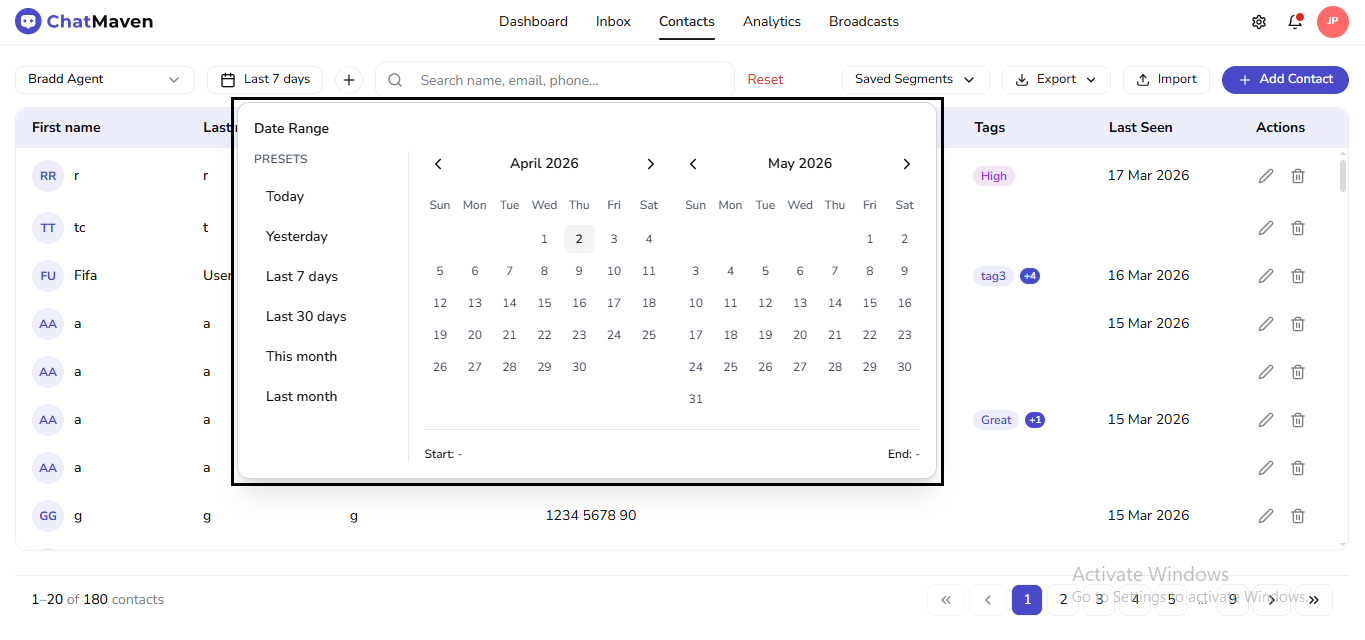
Date range: supports quick presets like Today, Yesterday, Last 7 days, Last 30 days, This month, and Last month.
-
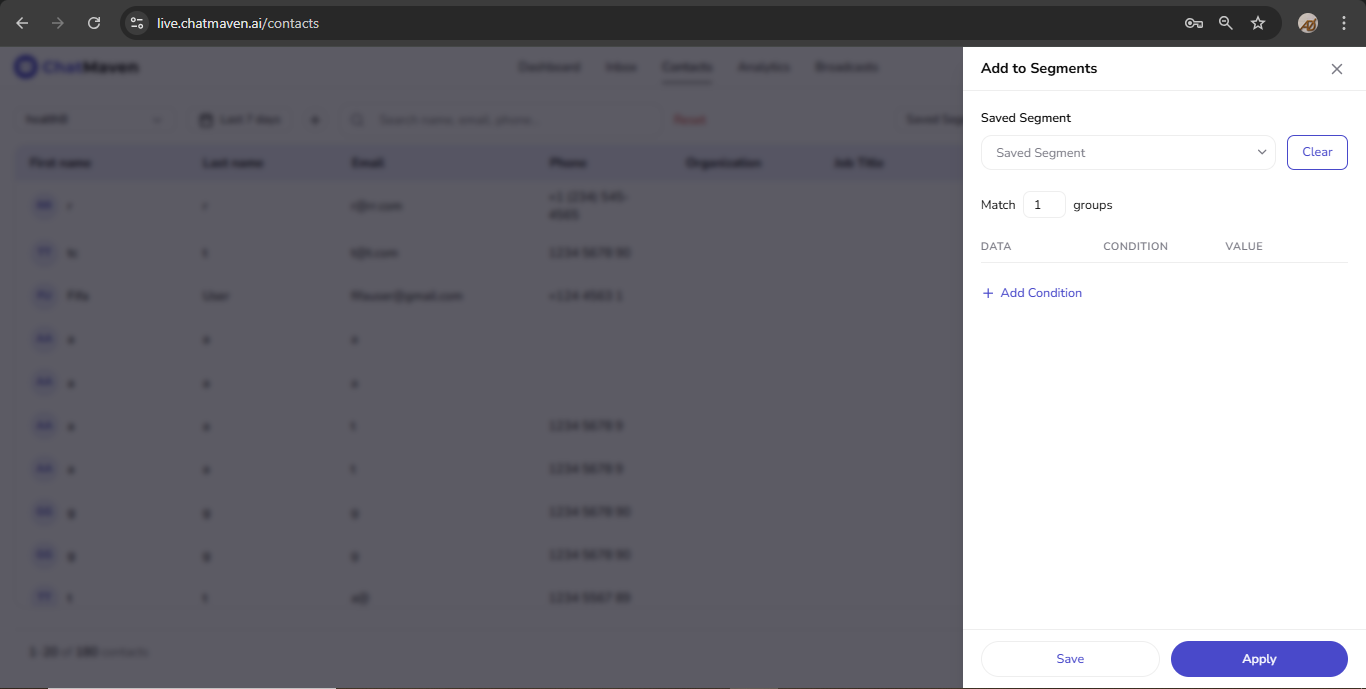
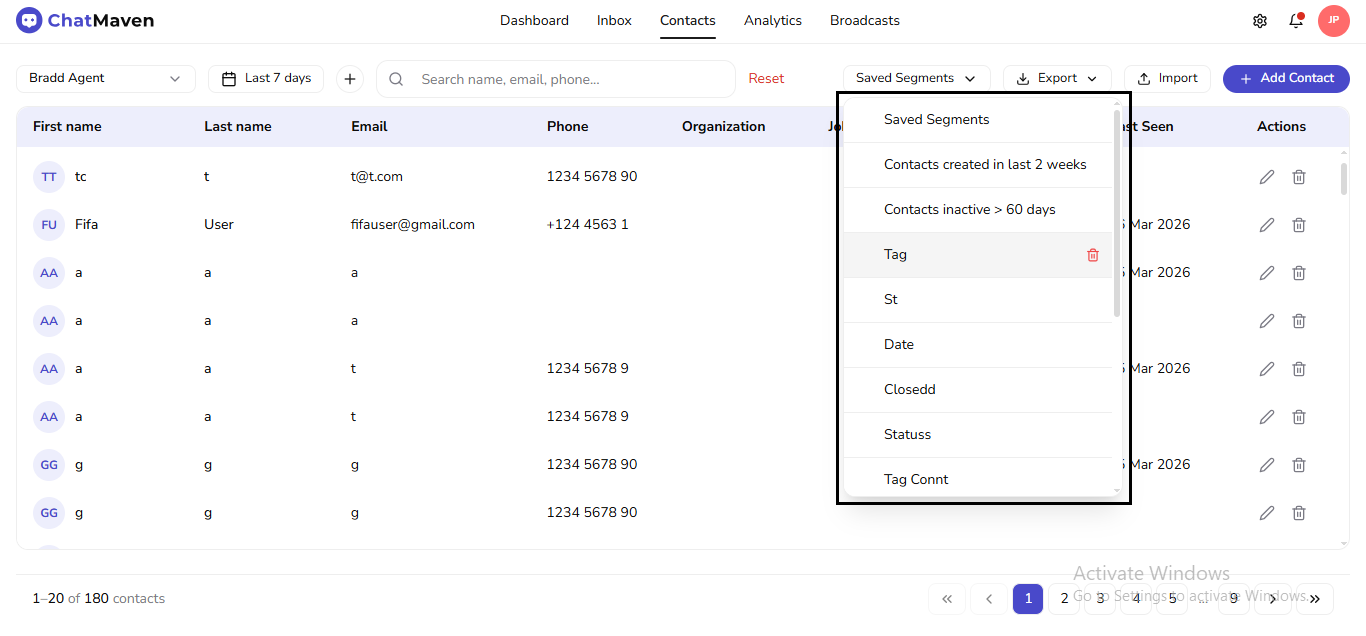
+ (plus, directly after the date range): opens Add to Segments, where you build filter rules and save a new contact segment (or apply rules without saving). This is the control to use when you want something like an “add segment” action; it is separate from the Saved Segments dropdown.
-
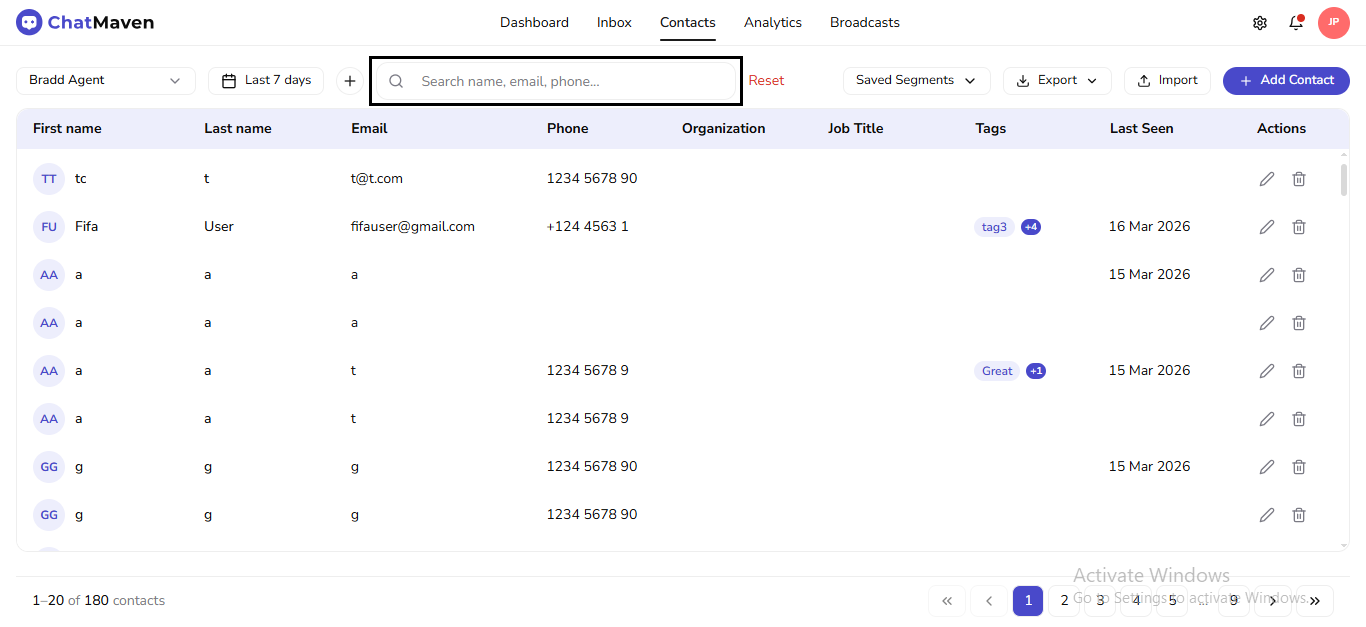
Search contacts and Reset: Search contacts is the field with placeholder Search name, email, phone…. Reset clears active filters and returns to the default list.
-
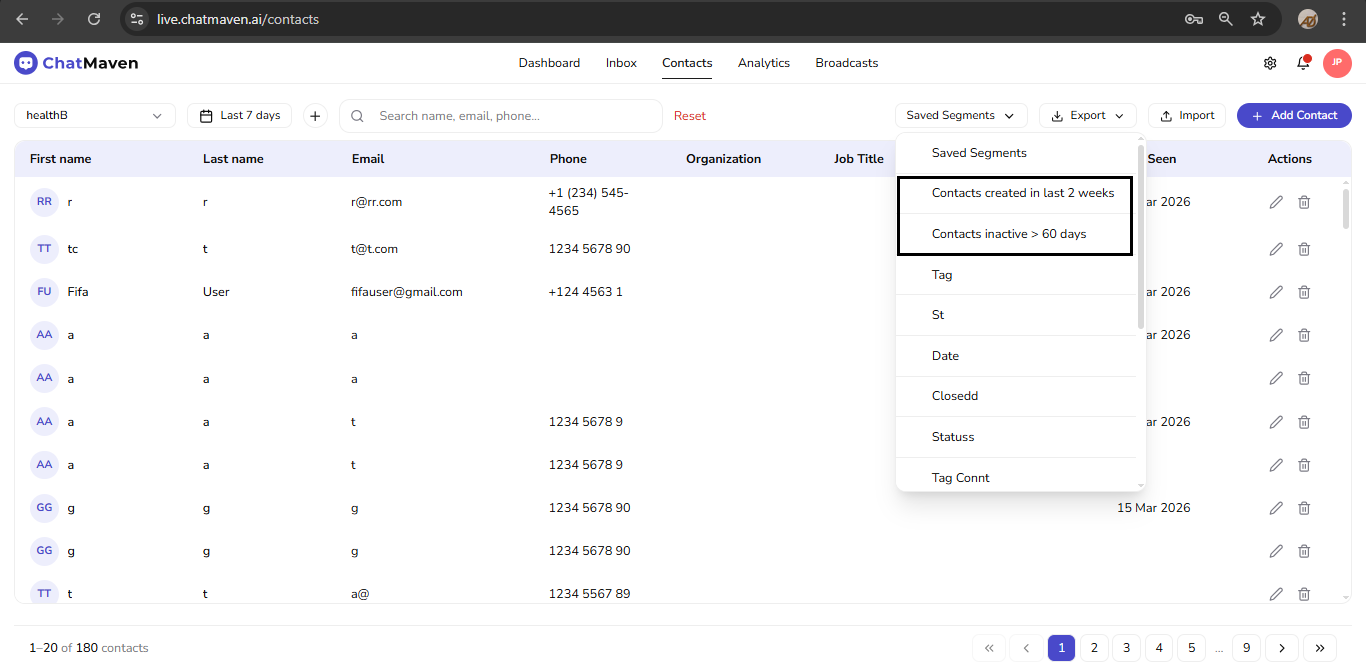
Saved Segments: loads pre-saved filtering rules.
-
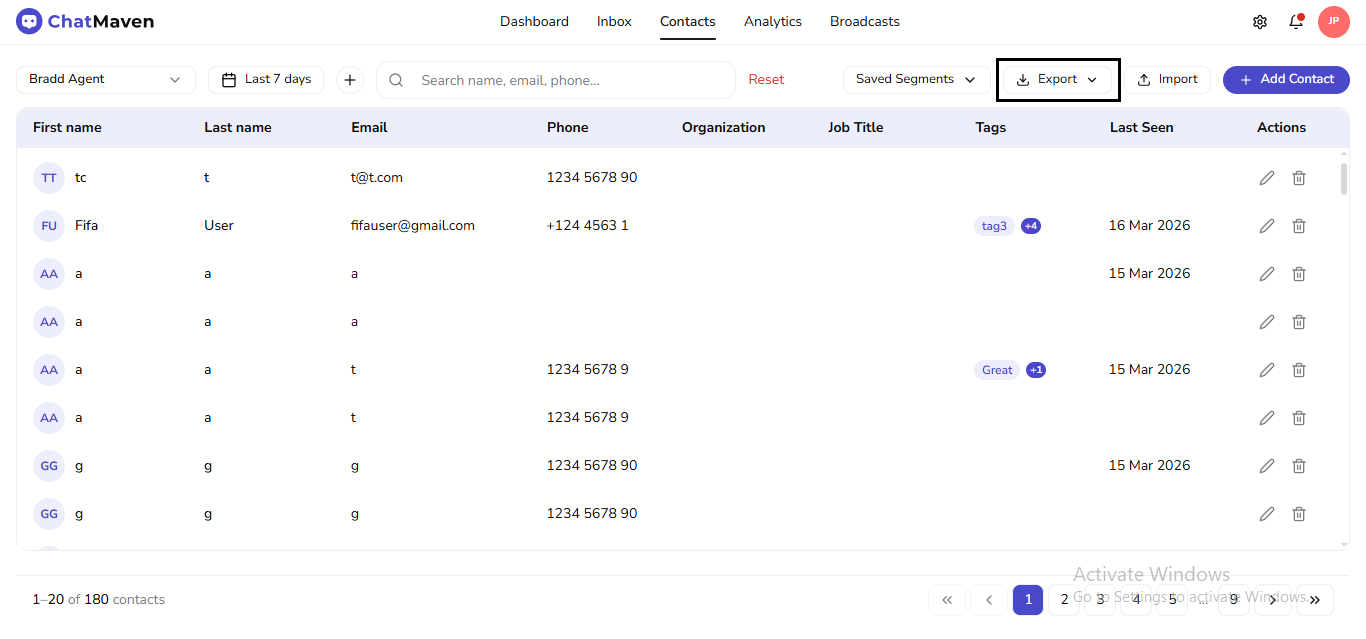
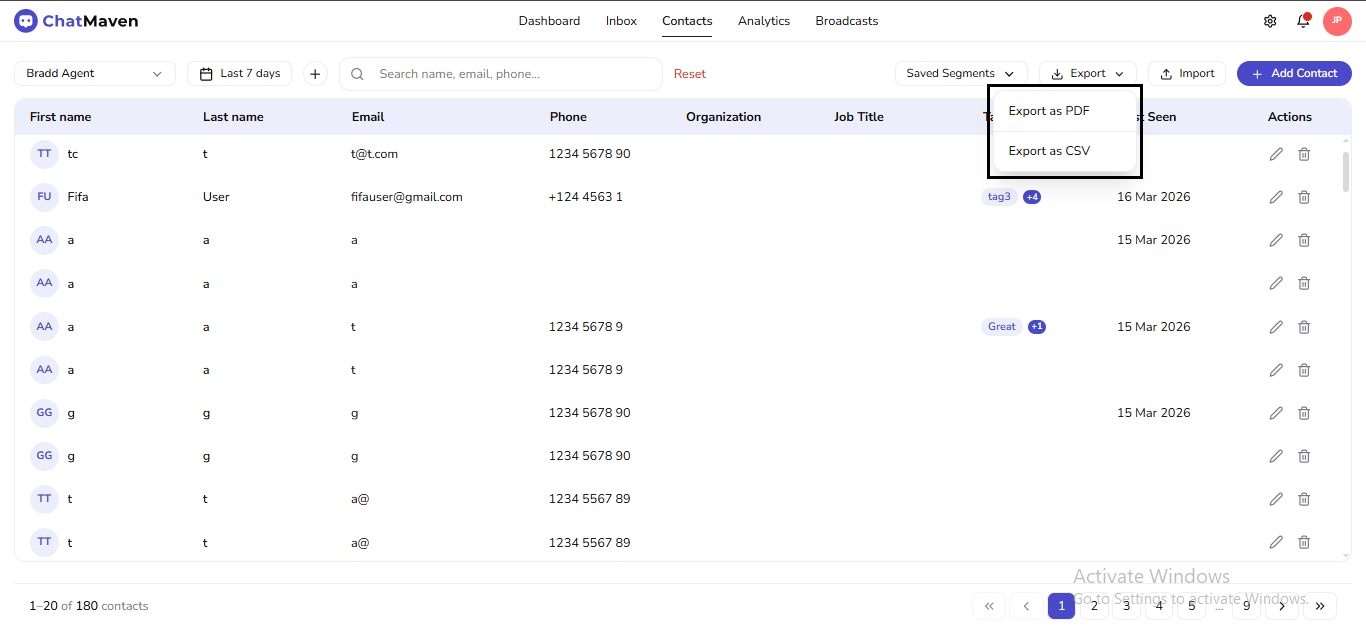
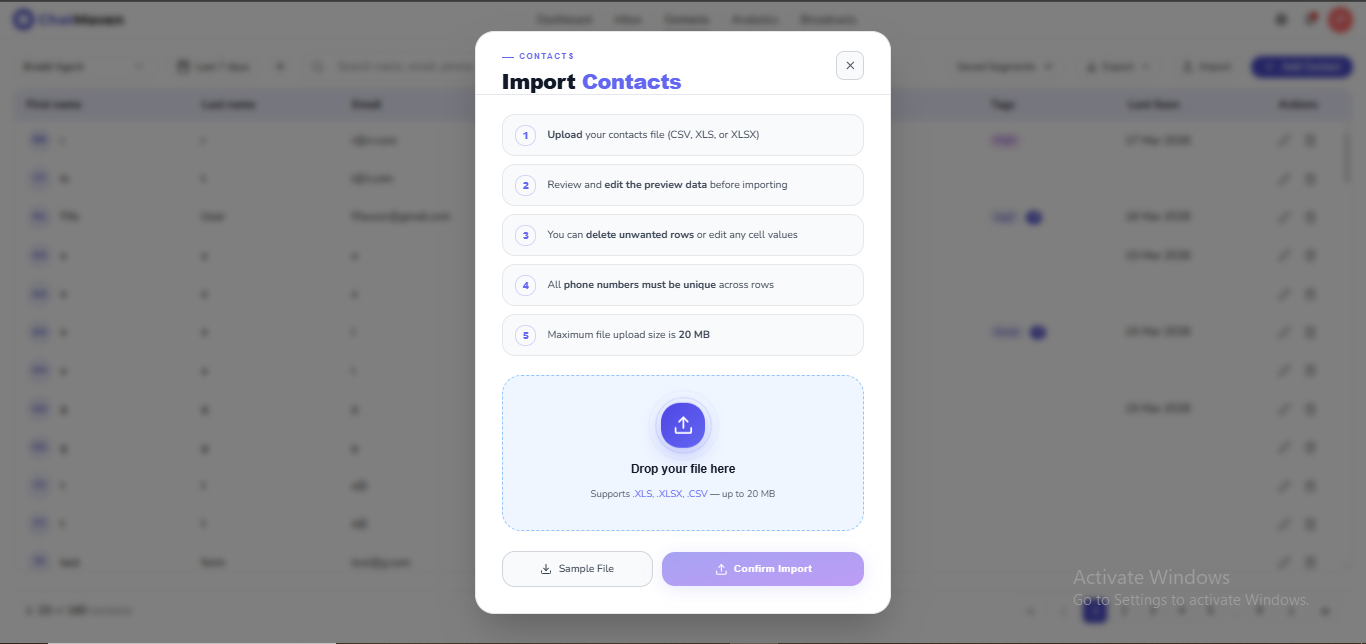
Export and Import: Export opens a menu; on the live app the options appear as Export as PDF then Export as CSV. Import uploads contacts in bulk through the import modal.
-
Add Contact: primary action (often shown with a leading + icon) that opens the manual create dialog.
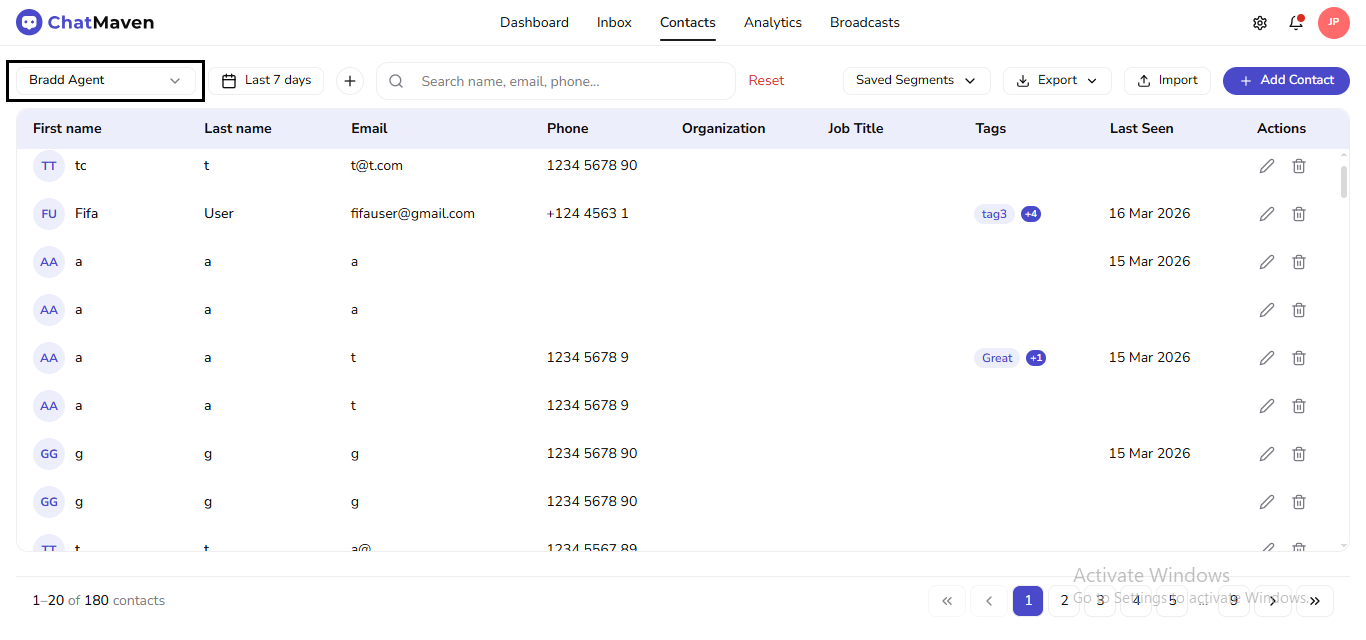
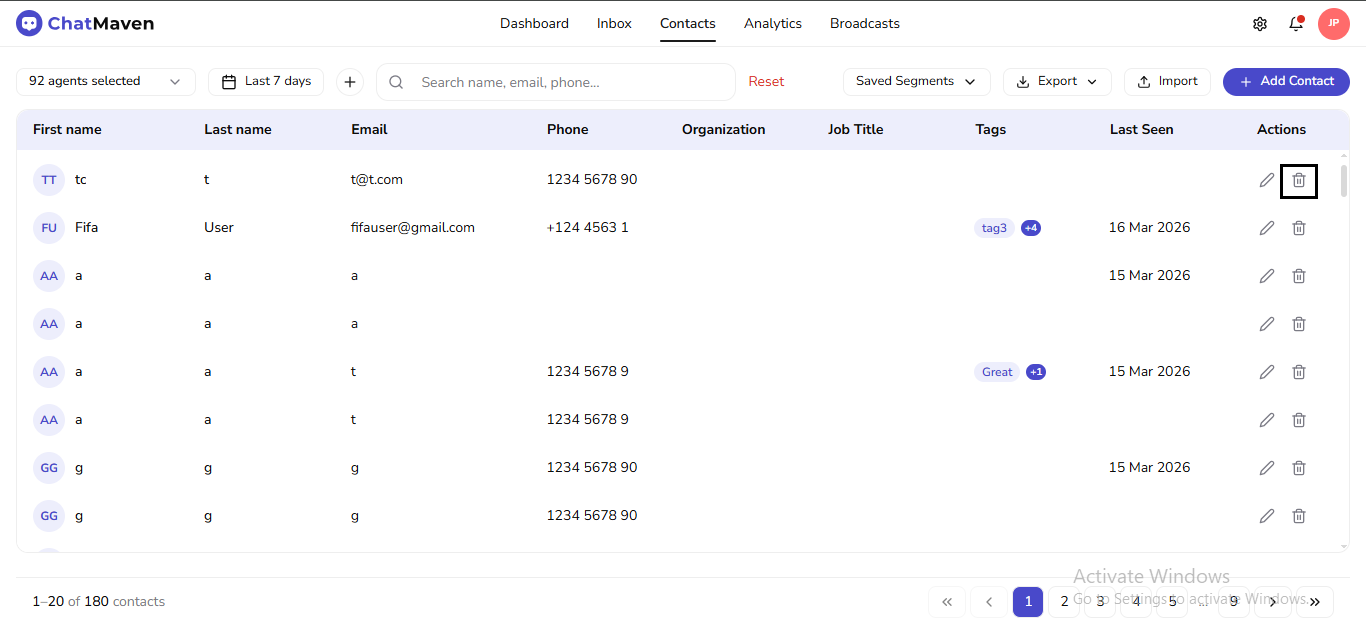
Contacts Table
Each row is one contact. Typical columns include:
- First name / Last name — often shown with a circular avatar or initials when no photo exists
- Email, Phone
- Organization, Job title — optional; may be blank until enriched
- Tags — colored pills; when there are many, the grid may show a compact count (such as “+1”) for extras
- Last seen — last activity date for that contact
- Actions — shortcuts such as edit and delete
Column headers may support sorting where the product exposes a sort control. What you see can depend on your workspace configuration and the active agent.
The footer shows a range summary (for example 1 – 20 of 180 contacts, with spaces around the dash) and pagination (first/previous, page numbers, next/last) so you move through the directory in pages.
Row Actions
The last column is Actions. Each row has two icons:
- Edit (pencil) — opens the full contact overlay (profile fields, Notes, Custom Fields, Forms, Conversations).
- Delete (trash) — starts removing that contact from the directory; finish in the confirmation dialog. Delete is not done from inside the profile overlay—you use the grid row.

Edit (open full profile)
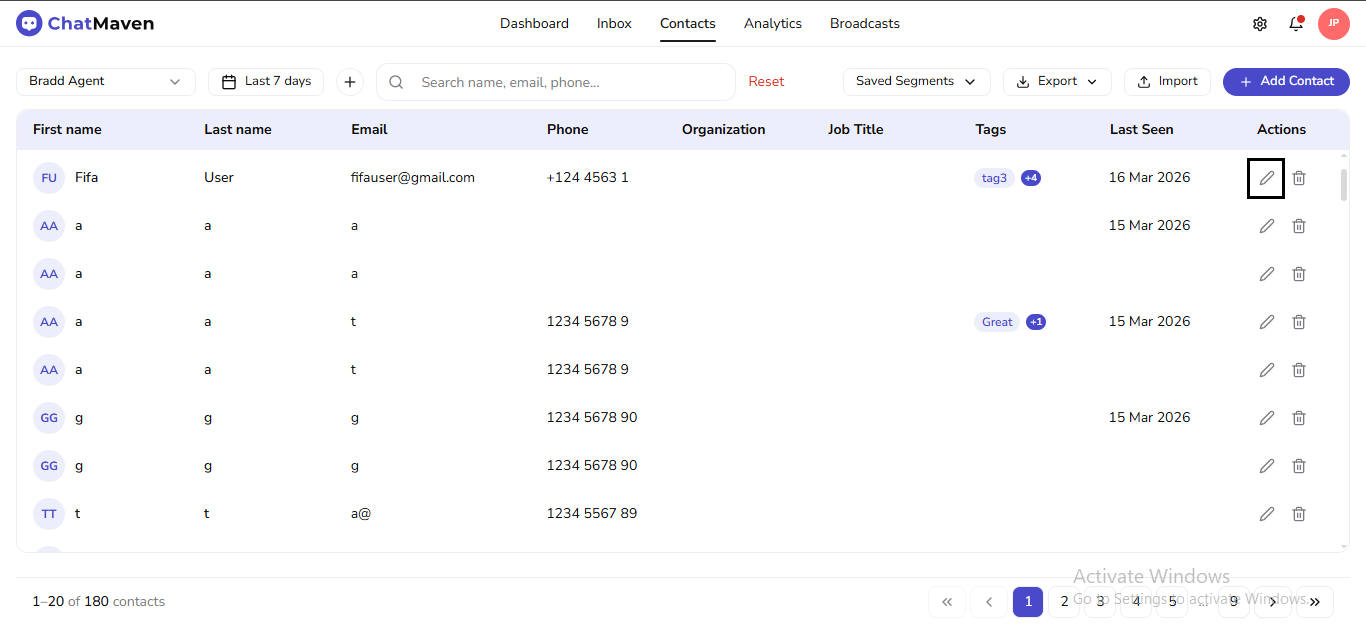
Opening the full profile editor from Contacts is always the row pencil. From Inbox, use View full profile (or the header pencil when shown) to reach the same overlay—only the breadcrumb prefix differs. See Contact Details.

Delete (from the grid)
Removing a contact is hard to undo and may affect related history. Double-check the row before you confirm.
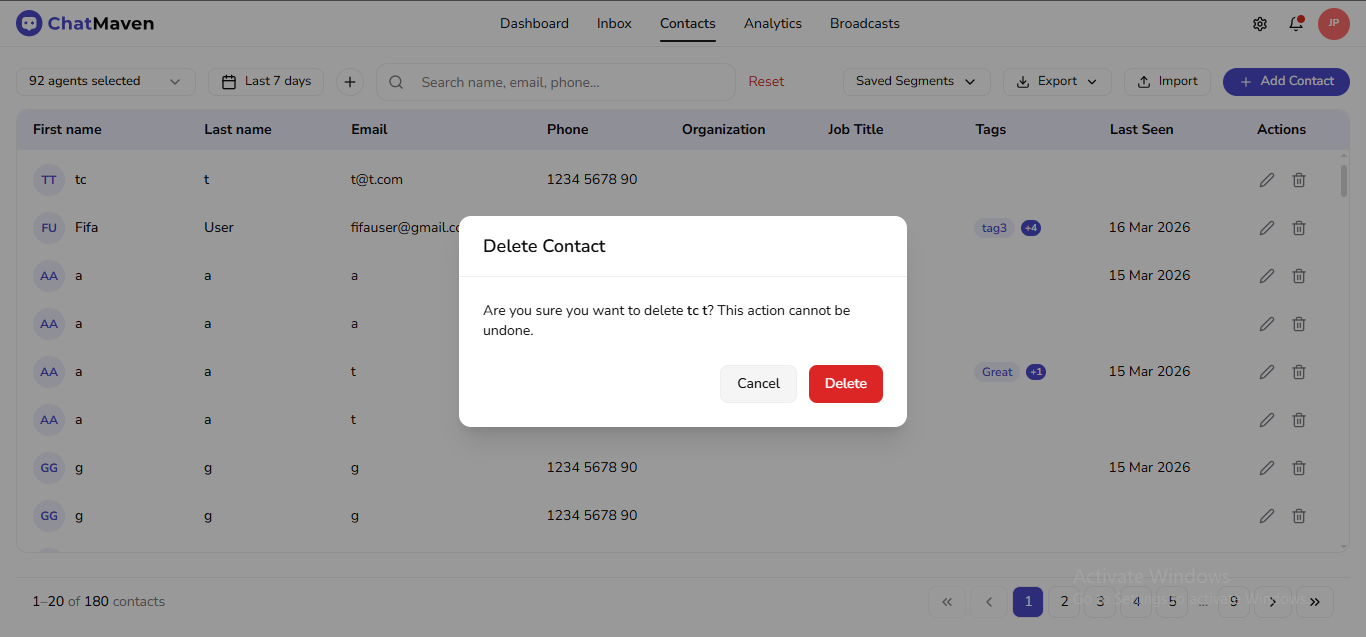
For step-by-step delete and editor topics, see Contact Details.
Search and Filtering Workflow
A practical workflow for day-to-day use:
-
Pick the Agent so the list matches the team or automation you care about.
-
Set the date range preset (for example Last 7 days) so recency matches your task.
-
Use Search contacts for a direct match on name, email, or phone.
-
Choose a Saved Segment when you need a stored rule set instead of ad hoc search.
-
Use Reset to drop search and segment scoping and return to a clean baseline.
When nothing matches, the table can look empty until you widen the date range, click Reset, or adjust segment rules.
Using Saved Segments
Saved segments let your team reuse contact criteria without rebuilding filters each time. Typical examples:
- Recently created contacts
- Inactive contacts
- Tag-based groups
- Status-focused lists
Built-in entries such as Contacts created in last 2 weeks and Contacts inactive > 60 days appear alongside your custom segments.
For setup and maintenance steps, see Segments.
Import and Export
The toolbar supports both outbound and inbound workflows:
-
Export opens the same menu described above (PDF, then CSV) so you can pick a read-only snapshot versus spreadsheet-friendly data.
-
Import opens the bulk uploader; limits and file types are documented in Import Contacts.
Export scope follows whatever filters, segment, date range, and agent are active, so confirm the toolbar before downloading a large extract.
Add Contact Modal
Click Add Contact to open the manual creation form.
In the current form:
- First name, Last name, and Email are marked as required
- Phone, Organization, and Title are optional
- The Add Contact button stays disabled until required fields are valid

For the full import flow, file requirements, and troubleshooting, see Import Contacts.
Best Practices
- Keep core fields (name, email, phone) complete for every record.
- Use consistent tag naming to avoid fragmented segments.
- Verify active filters before exporting data.
- Review and clean up rarely used segments on a schedule.
Next Steps
FAQ and troubleshooting
Contacts vs conversations?
A contact is a person record; conversations are message threads that may link to a contact when identified.
Search returns too many or too few results.
Refine filters, check date bounds, and remember partial name matches may hit unrelated records—use email or phone when possible.
Segments differ from the raw list?
Segments apply saved rules; see Segments for troubleshooting dynamic membership.