WhatsApp Flow
WhatsApp Flow video
Watch the Walkthrough video:
If the embedded player does not load, open it directly here: WhatsApp Flow video.
This guide walks you through checking your WhatsApp connection in ChatMaven, opening Meta’s Flow documentation, and creating a flow in WhatsApp Manager (categories, name, editor, publish). For connecting WhatsApp first, see WhatsApp Integration.
Steps: from ChatMaven to Meta Flows
1. Open WhatsApp in ChatMaven
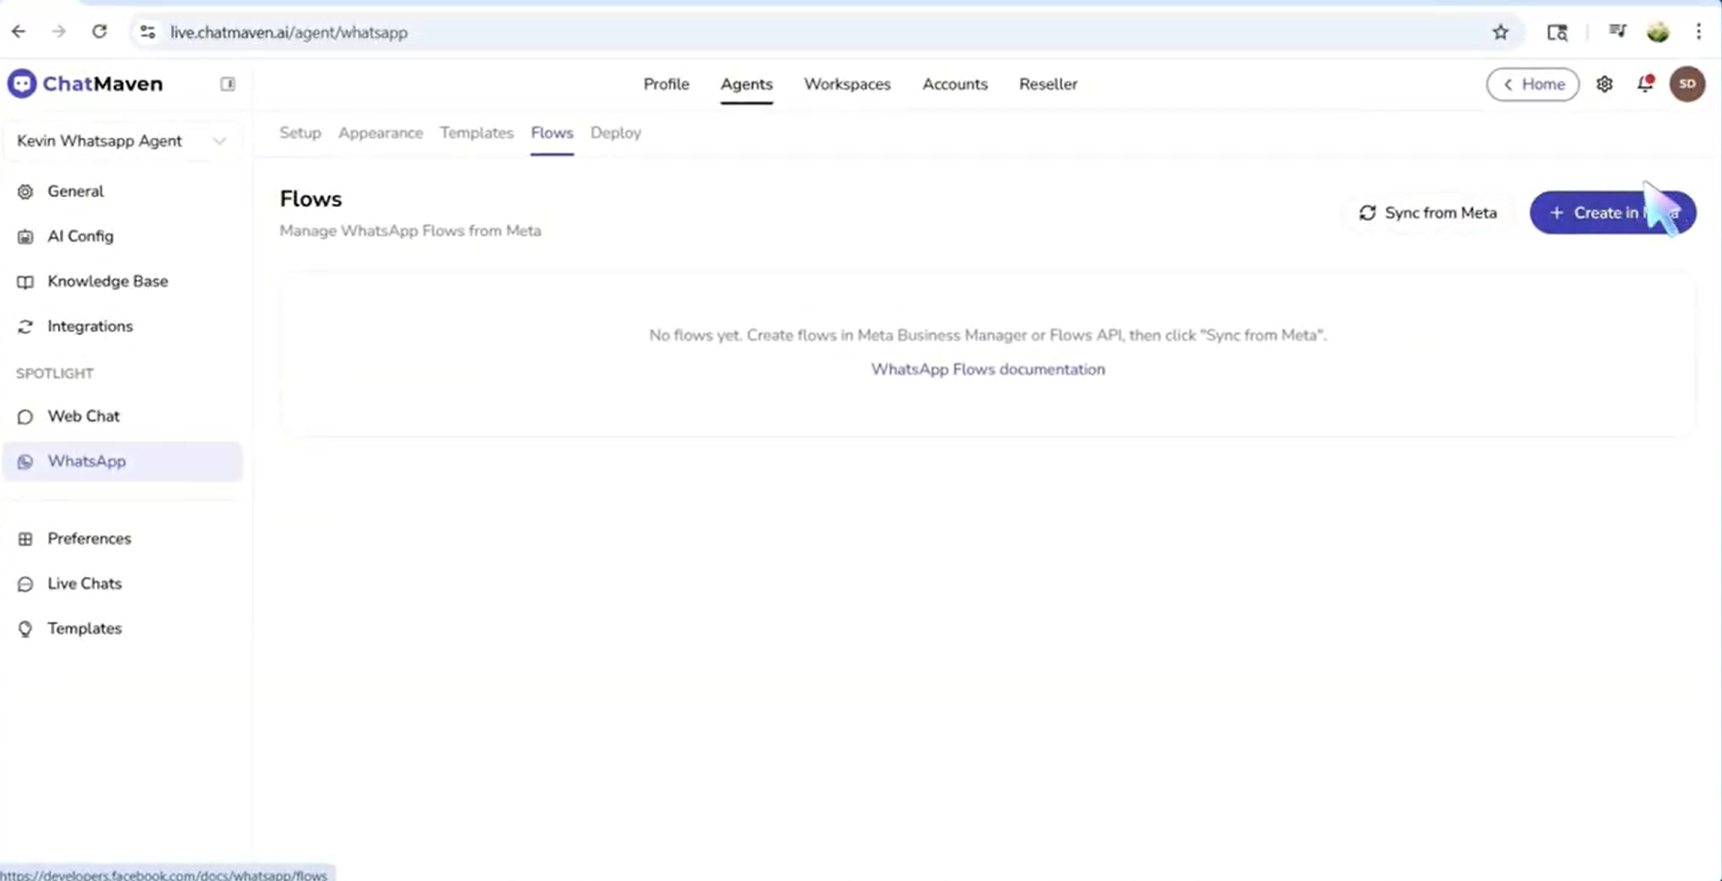
- Go to the WhatsApp tab under SPOTLIGHT for your agent.
2. Confirm WhatsApp API is connected
- Check that your WhatsApp API is integrated with ChatMaven. If it is not, complete WhatsApp Integration before continuing.
3. Open the Flows tab
- Open the Flows tab. You will see two actions: Sync flows and Create flows in Meta.
4. Open Meta’s Flow documentation
- Click Create flows in Meta. You will be taken to Meta’s documentation for Flow.
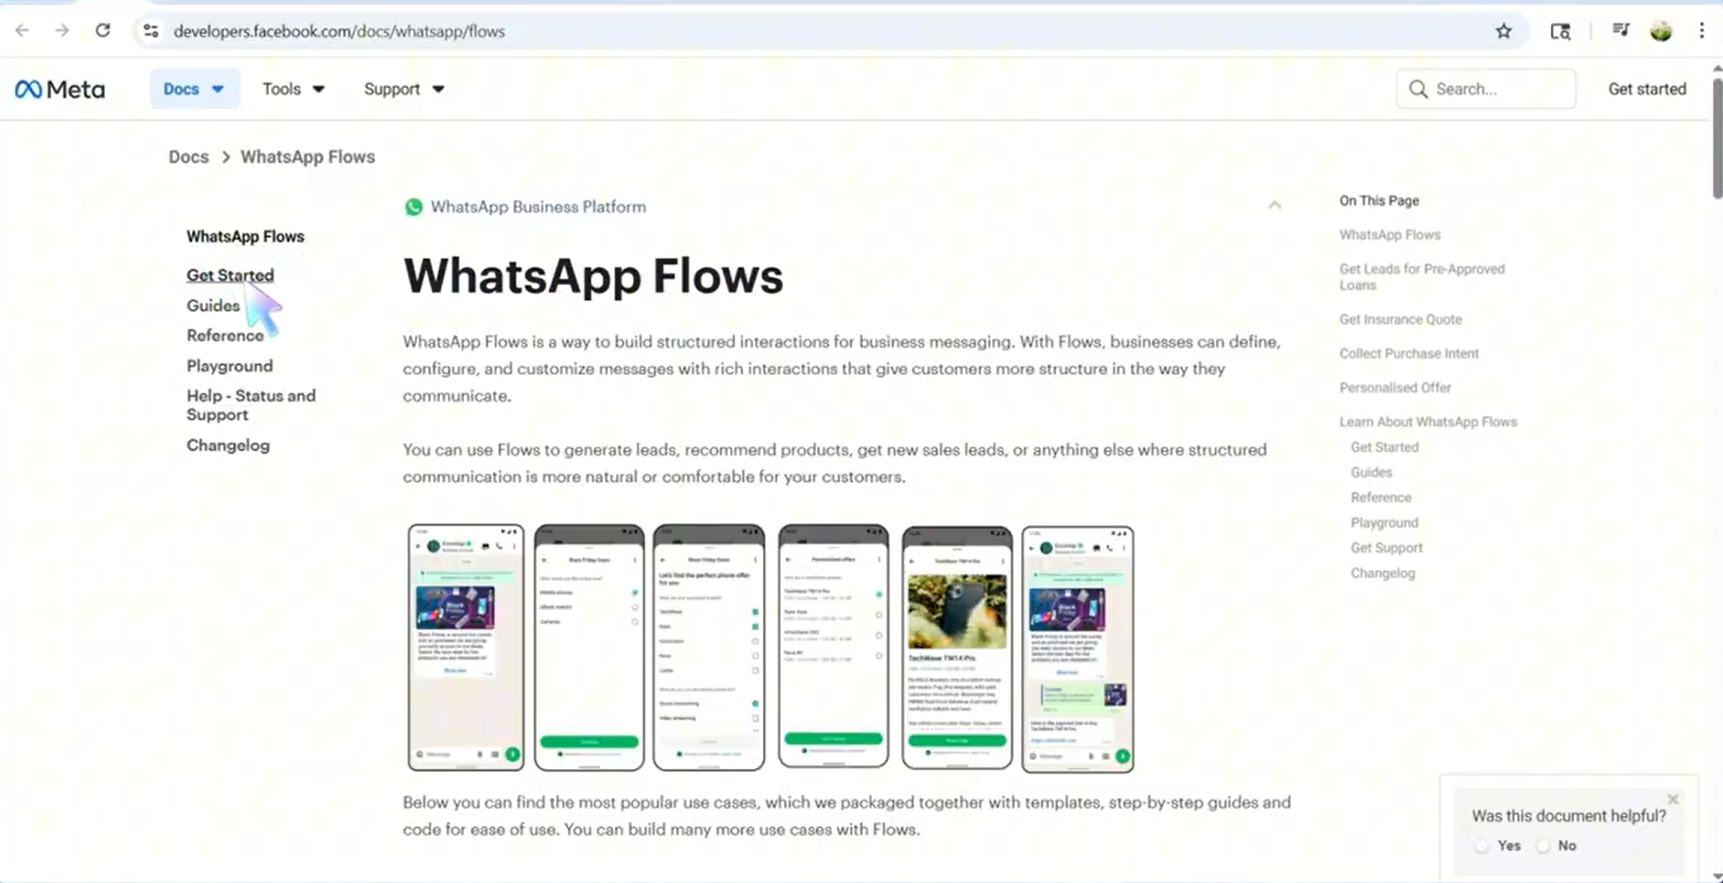
5. Get started
- In the documentation’s left sidebar, open Get started.
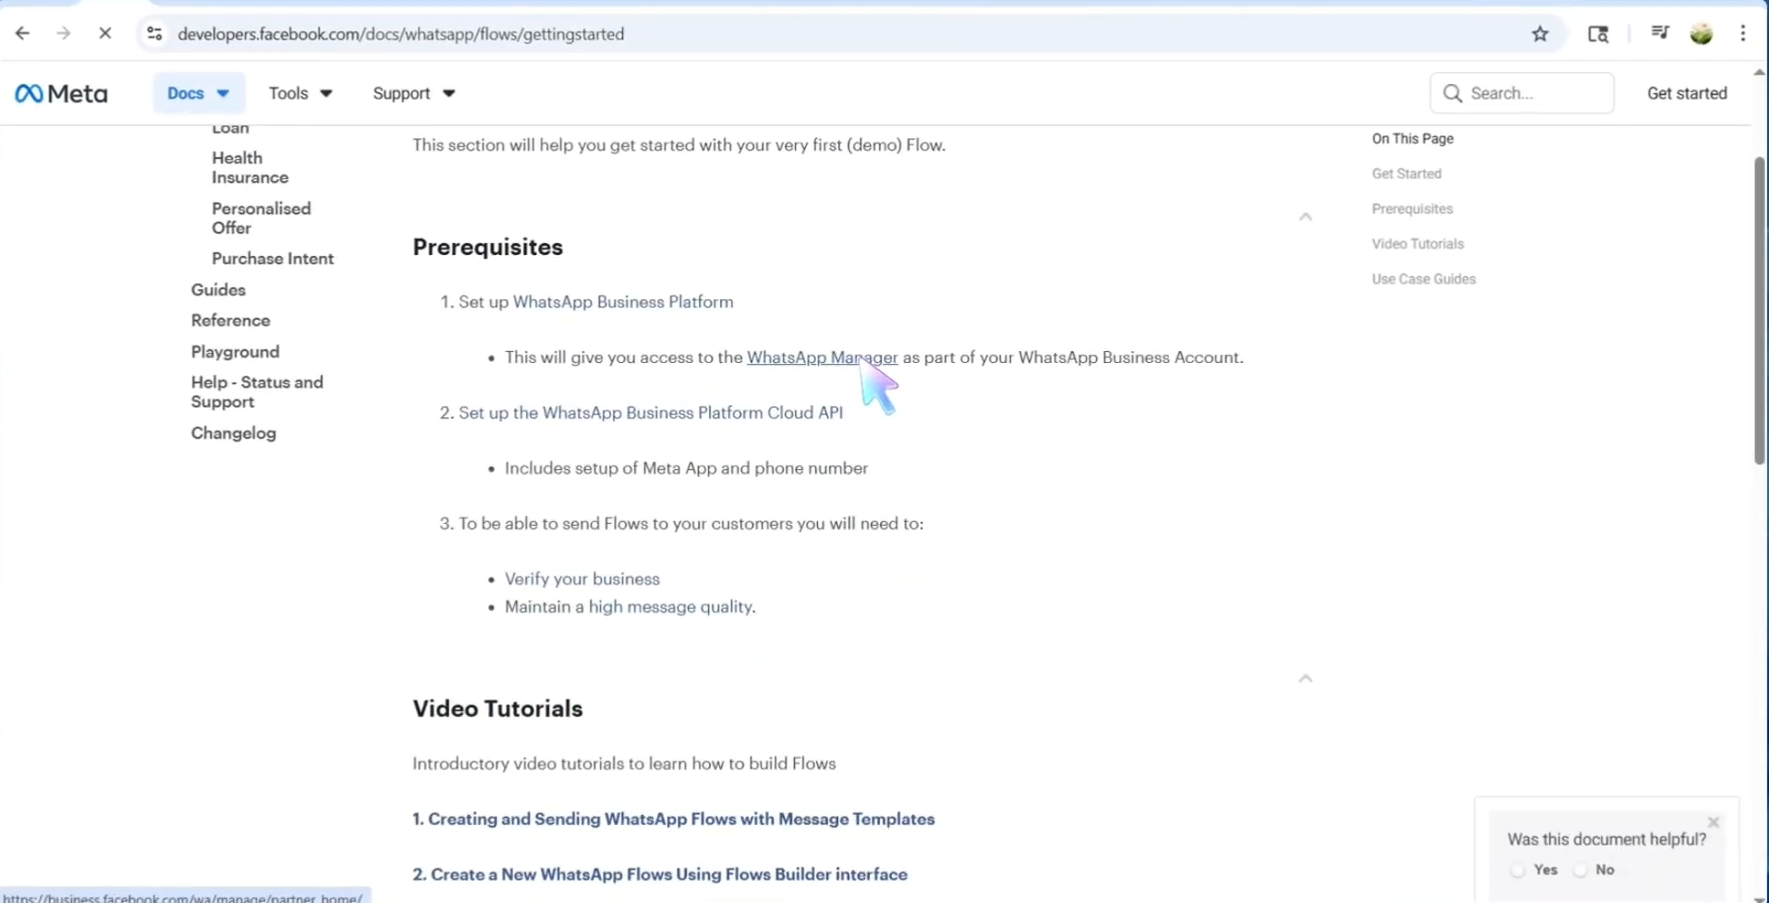
6. Open WhatsApp Manager from prerequisites
- Scroll down the Get started page until you reach Prerequisites. Find WhatsApp Manager and click it. You will jump to your Meta Business account context.
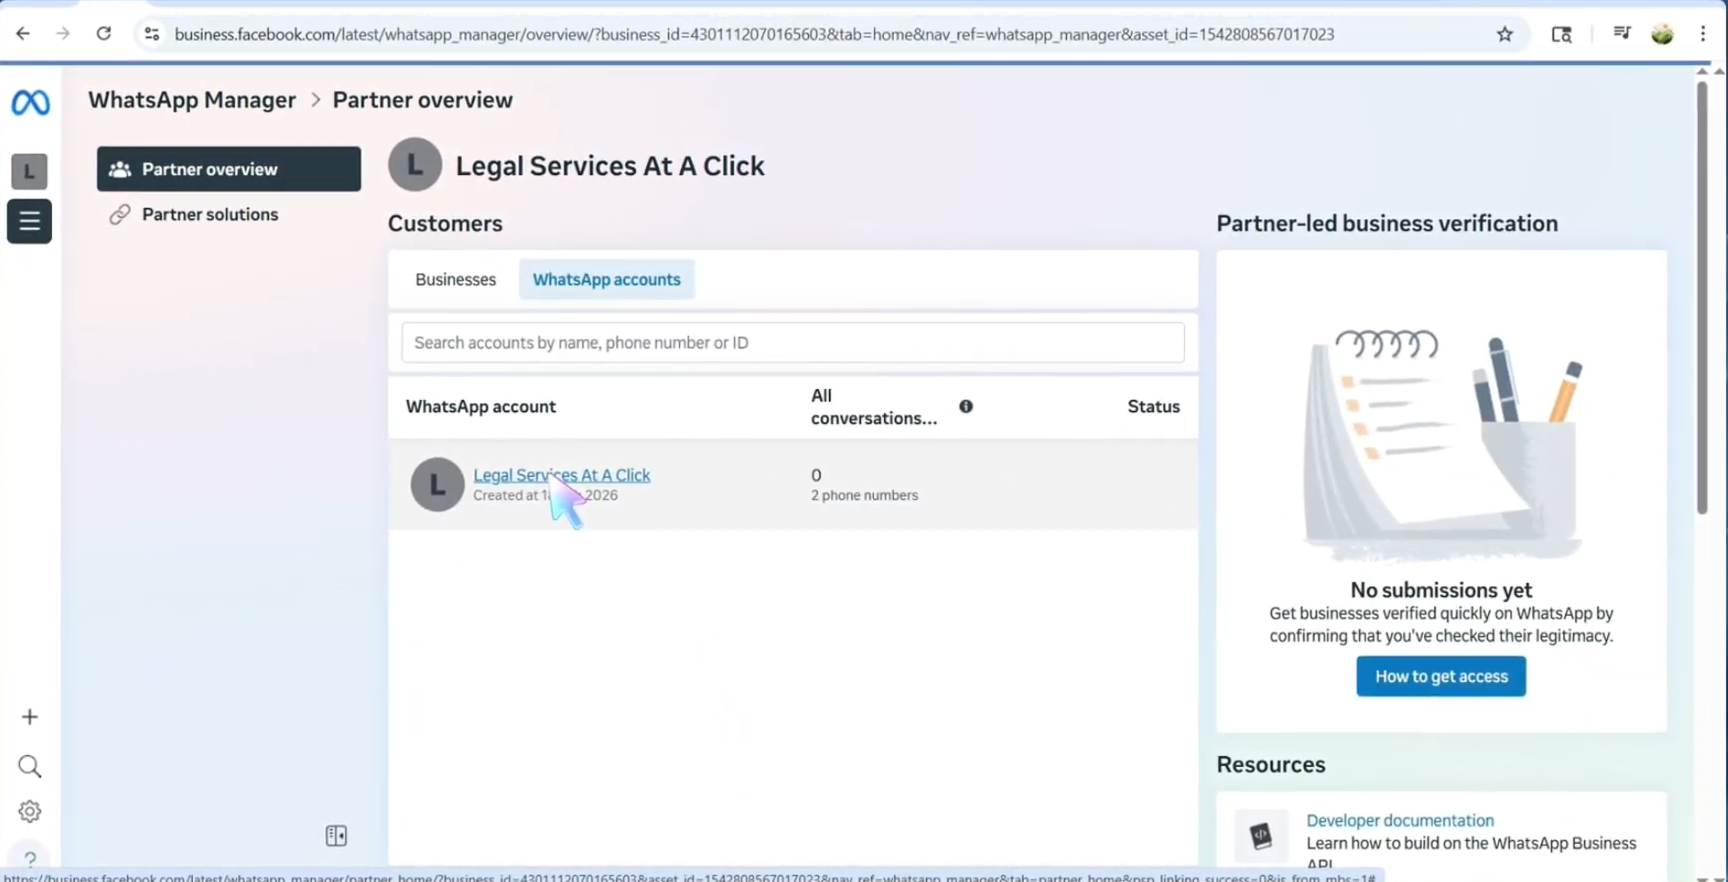
7. Select your WhatsApp account
- Open WhatsApp accounts. You will see your registered business account(s).
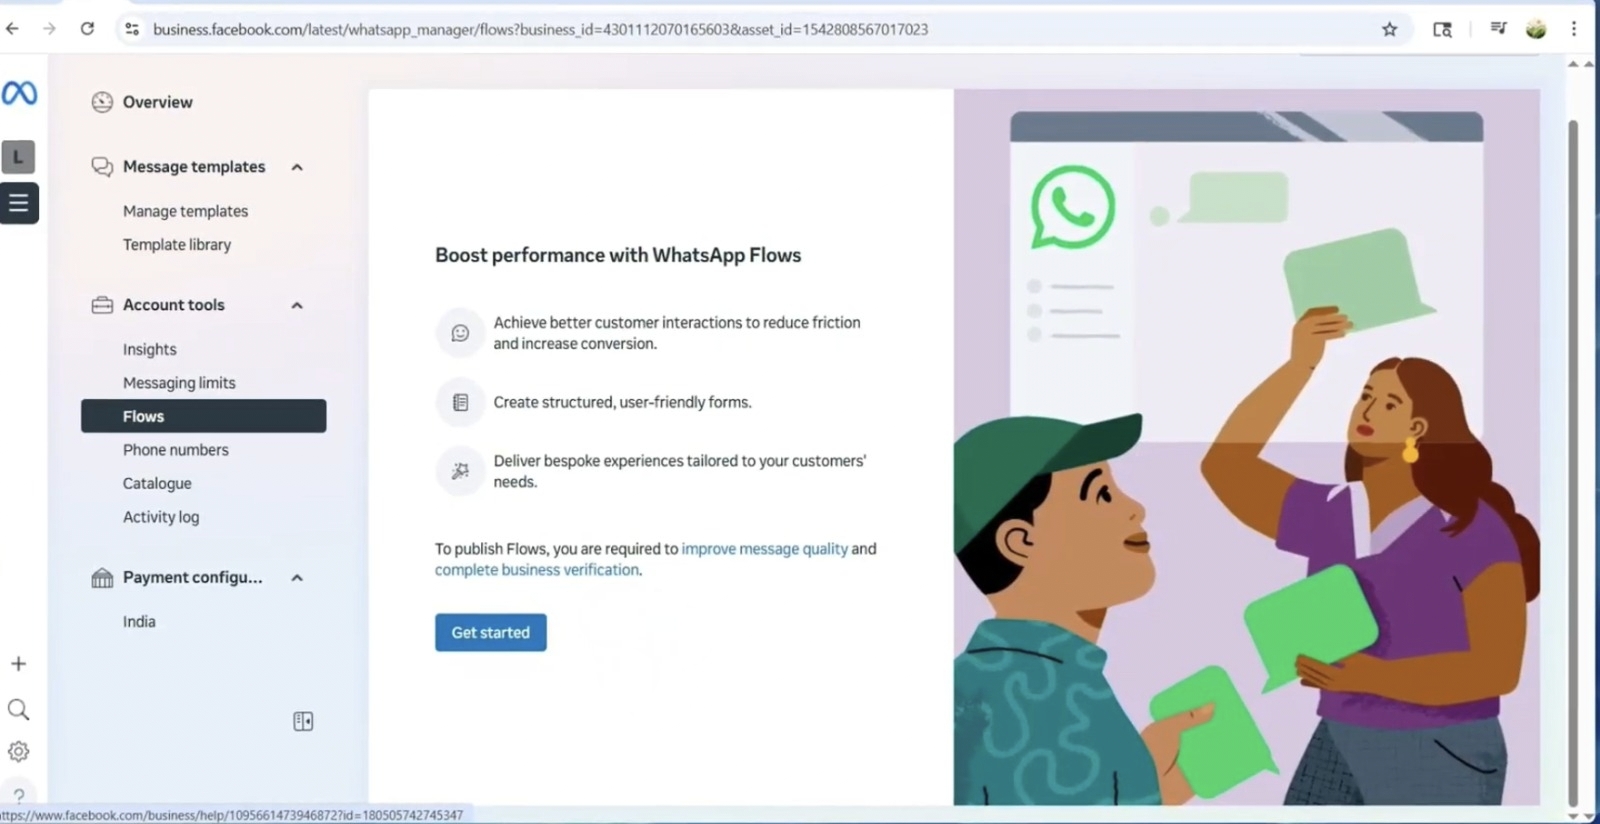
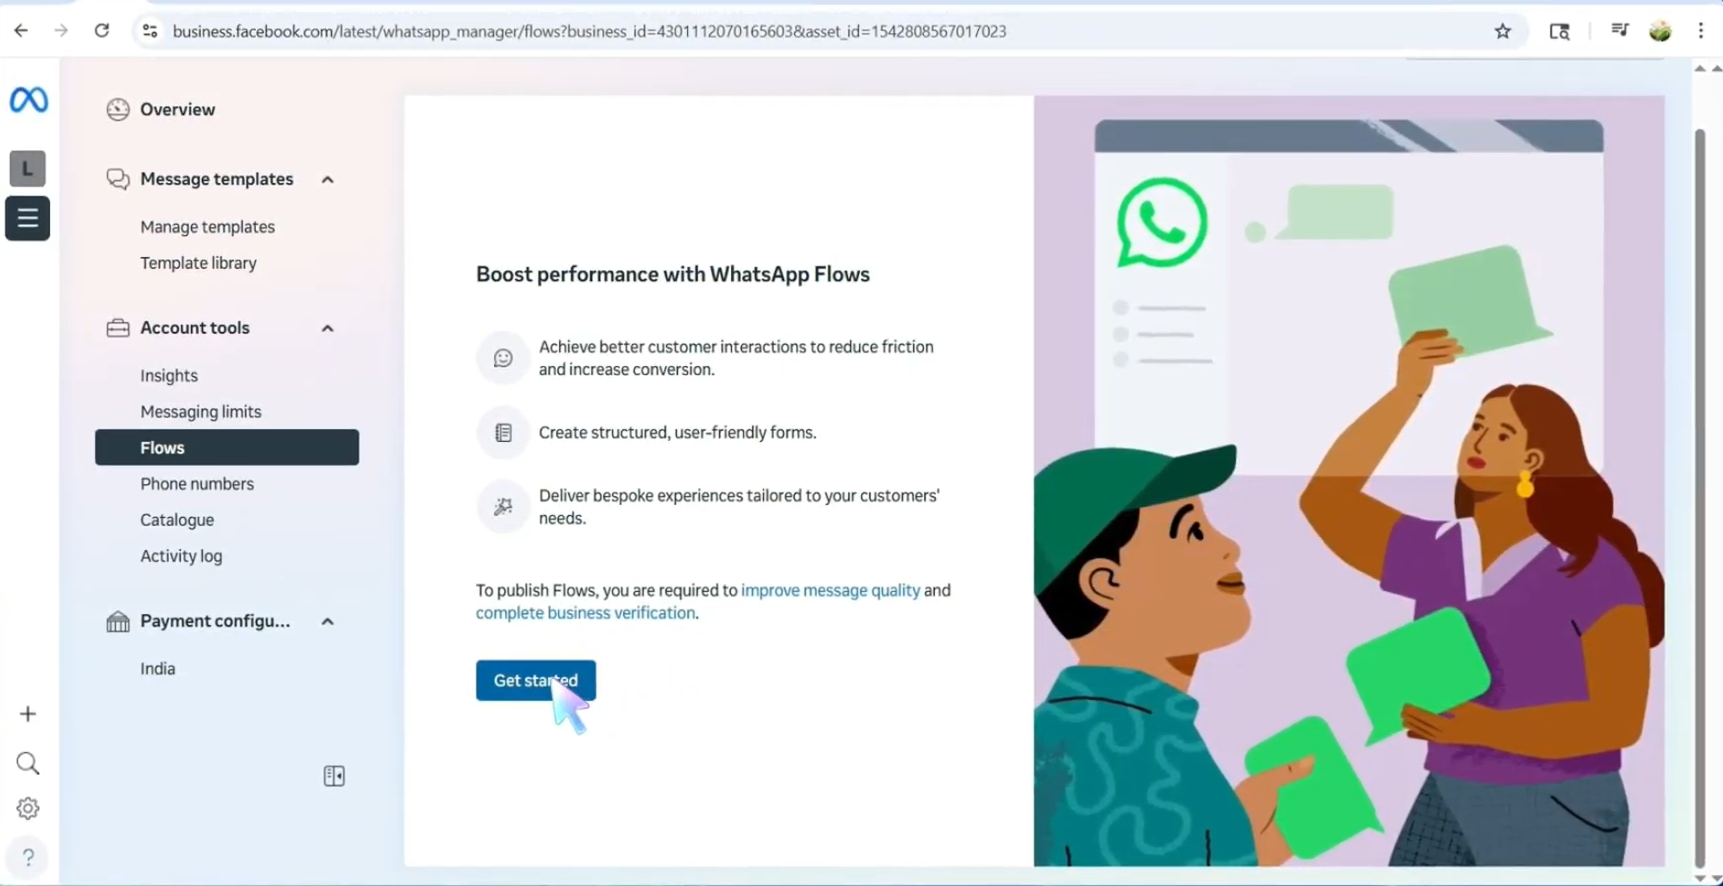
8. Open Flows and get started
- Click your specific business account. In the sidebar, under Account tools, click Flows, then click Get started.
9. Understand how your flow behaves
- This screen is where you define how your flow behaves.
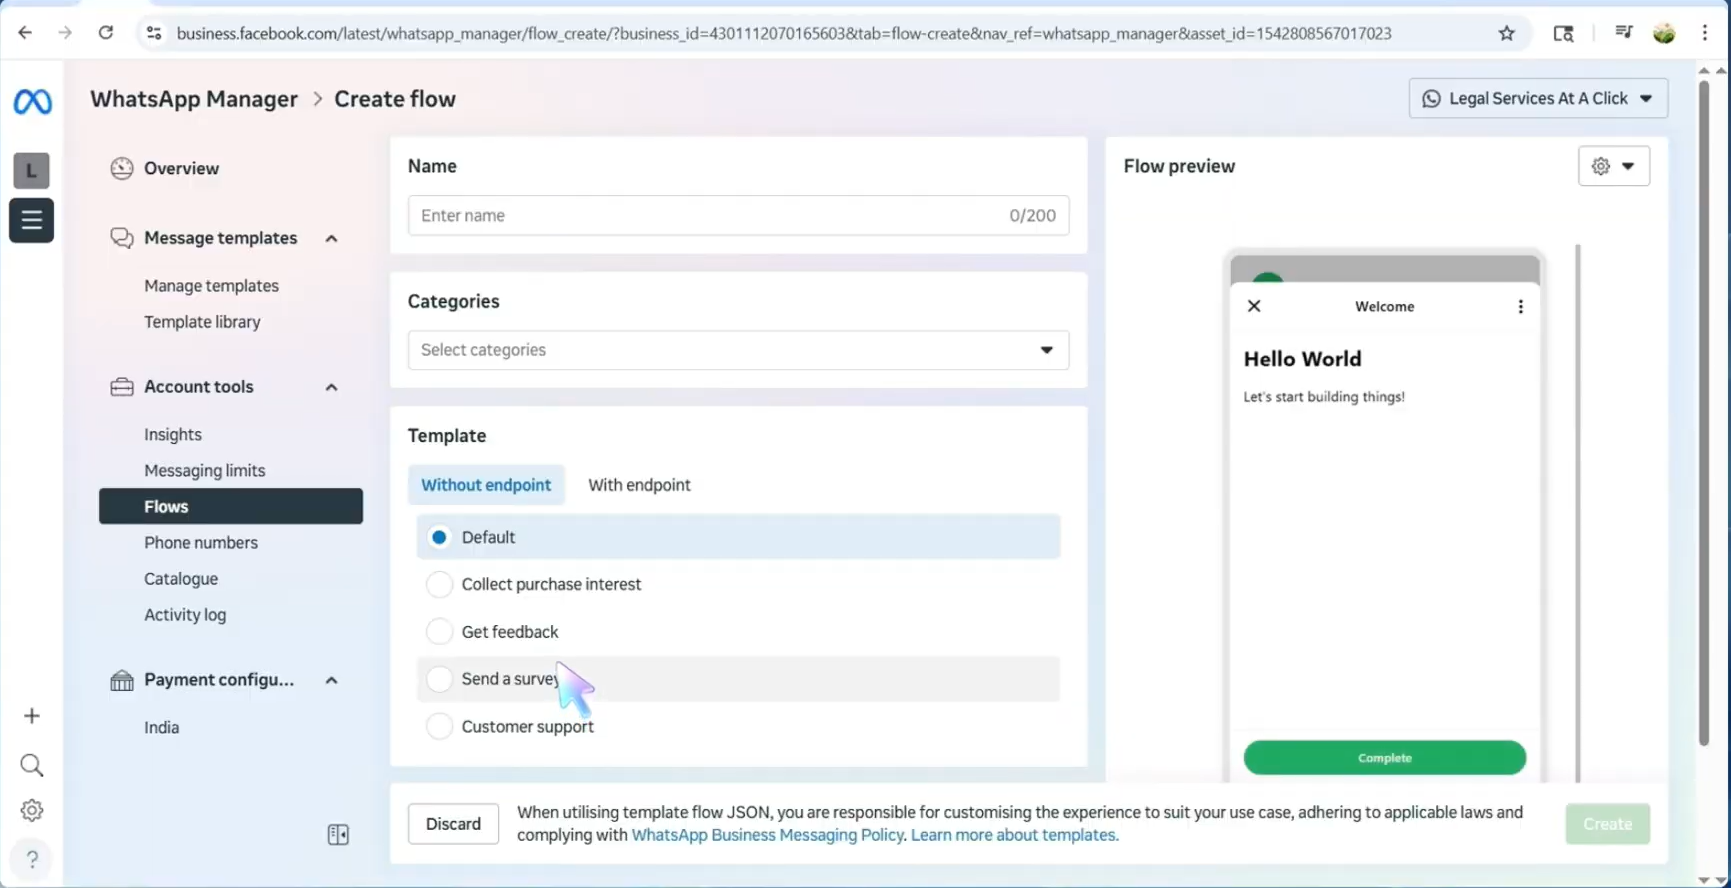
10. Templates and preview
- You can choose templates that work with an external endpoint within the Meta environment. Browse the available templates; use the live preview on the right to see how they look.
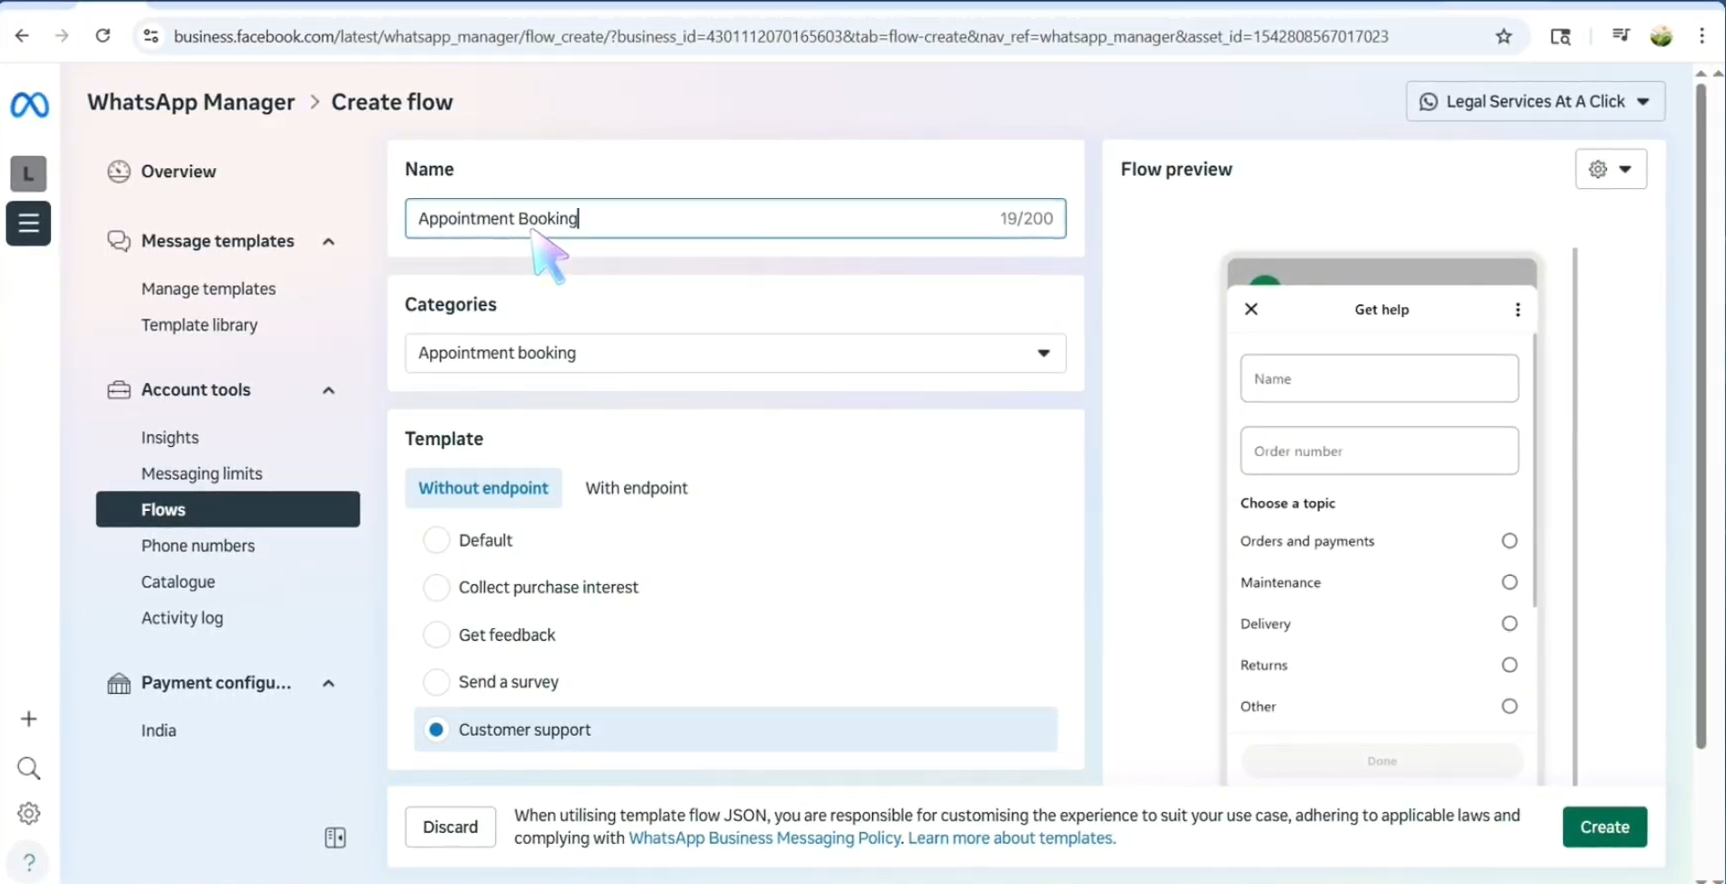
11. Categories, name, and create
- Set Categories first: click Categories and choose from the dropdown (for example Appointment booking and Lead generation).
Give your flow a specific name, then click Create at the bottom.
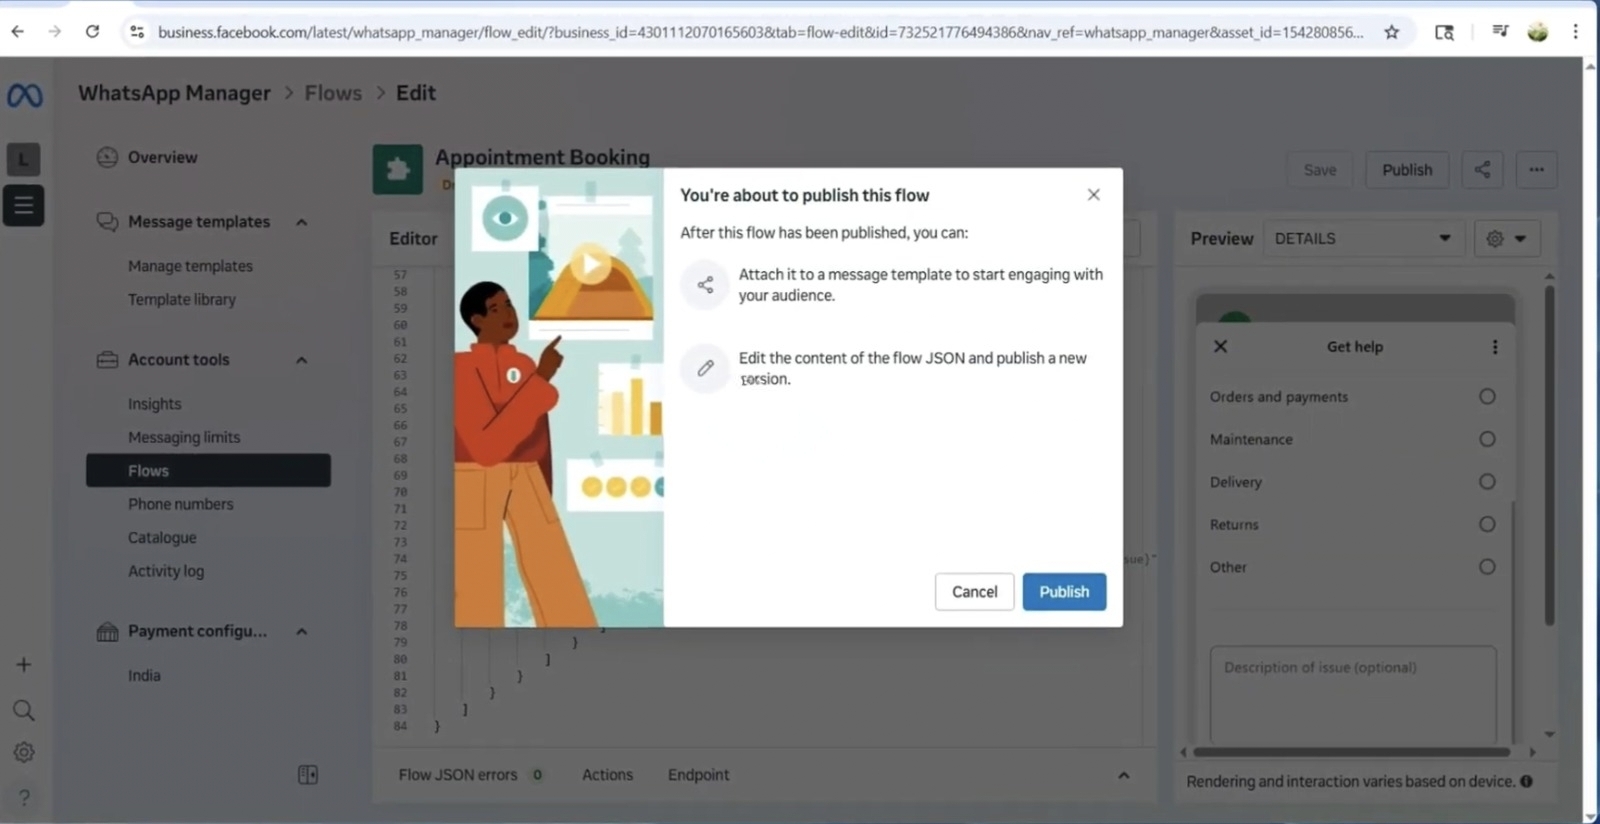
12. Editor, JSON, preview, and publish
- The flow editor opens: JSON on the left, interactive preview on the right. Click Publish in the top-right corner. When the confirmation dialog appears, click Publish again to finish. Then click Done.
After your flow is created
- Your flow appears in the list (for example an Appointment booking flow).
- Click it to review performance and details inside Meta.
Related links
FAQ and troubleshooting
The flow does not trigger or stalls mid-way.
Validate trigger conditions (keywords, template buttons) and that the flow is published in the builder. Check for required variables missing in the session.
Users see an error node.
Open the flow analytics or logs if available; often a HTTP request node failed validation or timed out. Test with a narrow audience before broad rollout.
Can I branch on CRM data?
Yes if your flow can call ChatMaven or an external API with the right credentials. Keep payloads small and handle timeouts so the user always gets a fallback message.